How Does a Nail Gun Work? Complete Beginner’s Guide 2025
Picture this: You’re standing in the tool aisle, staring at a wall of nail guns, wondering if investing in one will actually make your weekend projects easier—or if you’ll end up with a expensive paperweight gathering dust in your garage. I’ve been there, and after two decades of using these tools professionally and helping countless DIYers choose their first nail gun, I can tell you that understanding how a nail gun works is the key to unlocking faster, more professional-looking results in your home improvement projects.
In this comprehensive guide, you’ll discover the inner workings of nail guns, learn which type suits your specific needs, and master the techniques that separate weekend warriors from true craftsmen. By the end, you’ll have the confidence to choose, operate, and maintain a nail gun like a pro.
Quick Overview: Key Takeaways
• Pneumatic nail guns use compressed air and are most powerful for heavy-duty work • Electric nail guns (corded/cordless) offer convenience and consistent power for most DIY projects
• Gas-powered nail guns provide portability without air compressors but cost more to operate • Safety mechanisms prevent accidental firing and are your first line of defense • Proper nail selection is crucial—wrong nails can jam your gun or create weak joints
The Basic Anatomy: What Makes a Nail Gun Tick
Before diving into the different power sources, let’s understand the fundamental components that make every nail gun function. Think of a nail gun as a highly specialized hammer that never misses and delivers consistent force every time.
The Magazine System
The magazine is your nail gun’s ammunition depot. It holds a strip or coil of nails and feeds them one at a time into the firing chamber. The magazine design determines what type and size of nails you can use, which is why you’ll see different magazine angles (straight, angled, or coiled) on different nail guns.
I learned this lesson the hard way during my first trim carpentry job when I loaded 16-gauge nails into a 15-gauge gun. The result? Three hours of frustration and a magazine that needed professional cleaning. Always match your nails to your gun’s specifications.
The Driving Mechanism
This is where the magic happens. Regardless of power source, every nail gun uses a driver blade (or piston) that rapidly strikes the nail head, driving it into your material. The key is the speed and force of this action—a good nail gun drives a nail in milliseconds with tremendous precision.
Pro Tip: The driver blade should retract completely after each shot. If it sticks or moves slowly, your gun needs maintenance or has insufficient power for the nail size you’re using.
Safety Contact Elements
Modern nail guns feature two primary safety mechanisms:
- Sequential firing: Requires you to depress the safety tip first, then pull the trigger
- Contact firing: Allows rapid firing by holding the trigger and “bouncing” the safety tip
For beginners, I always recommend starting with sequential firing mode. It’s slower but dramatically reduces the chance of accidental discharge.
Pneumatic Nail Guns: The Workhorse of Professional Construction
Pneumatic nail guns harness the power of compressed air, making them the go-to choice for professional contractors and serious DIYers. Here’s exactly how they transform air pressure into driving force.
The Compression Cycle
When you pull the trigger, compressed air from your compressor rushes into a cylindrical chamber above the driver piston. This creates a pressure differential that forces the piston down at incredible speed—often exceeding 1,400 feet per second.
The beauty of this system lies in its adjustability. By regulating air pressure at your compressor (typically between 70-120 PSI), you can fine-tune the driving force for different materials. Softwoods need less pressure; hardwoods and engineered materials require more.
Why Pneumatic Systems Excel
During my contracting days, I consistently chose pneumatic guns for framing because they deliver:
- Unlimited runtime (as long as your compressor keeps up)
- Consistent power regardless of ambient temperature
- Lower maintenance costs compared to gas-powered alternatives
- Faster cycling between shots
Real-World Example: When we framed a 2,400-square-foot house, our pneumatic framing nailers drove over 10,000 nails without missing a beat. Try that with a cordless gun and you’d burn through multiple battery packs.
The Drawbacks to Consider
Pneumatic systems aren’t perfect. You’re tethered to an air compressor, which means:
- Setup time for each job location
- Mobility limitations due to air hoses
- Additional equipment costs (compressor, hoses, fittings)
- Noise levels that may disturb neighbors
Electric Nail Guns: Convenience Meets Performance
Electric nail guns have revolutionized DIY projects by eliminating the need for compressors while delivering reliable performance. They operate using two distinct mechanisms.
Corded Electric Systems
Corded electric nail guns use a rotating flywheel system powered by a high-speed motor. When you pull the trigger, the spinning flywheel transfers its stored kinetic energy to the driver blade through a clutch mechanism.
This system provides several advantages:
- Consistent power delivery as long as you’re plugged in
- No pressure adjustments needed—the gun automatically adapts
- Immediate readiness—no warm-up time like pneumatic systems
- Quieter operation than pneumatic alternatives
Cordless Battery Technology
Modern cordless nail guns use either:
Brushless Motor Systems: These create rotational force that’s converted to linear driving motion through internal mechanisms. They’re efficient but typically limited to lighter-duty applications.
Gas Cartridge Hybrid Systems: These combine battery power with small fuel cells to create combustion-driven force. They bridge the gap between convenience and power but increase operating costs.
Pro Tip: If you’re choosing cordless, invest in brushless motor technology. The efficiency gains mean longer battery life and more consistent performance throughout the charge cycle.
Gas-Powered Nail Guns: Maximum Portability
Gas-powered nail guns represent the ultimate in portability, using small fuel cells and battery-powered ignition systems to create controlled combustion that drives nails.
The Combustion Process
Here’s what happens in the split second you pull the trigger:
- Fuel injection: A precise amount of butane/propane mix enters the combustion chamber
- Ignition: A battery-powered spark plug ignites the fuel
- Expansion: Rapid gas expansion drives the piston down
- Exhaust: Spent gases vent while the piston resets
This process delivers power comparable to pneumatic systems while maintaining complete portability. I’ve used gas guns for roofing work where running air lines would be impractical.
Operating Cost Considerations
Gas guns require ongoing fuel purchases. A typical fuel cell costs $8-12 and drives approximately 1,200-1,500 nails, depending on nail size and material density. For occasional use, this is reasonable. For high-volume work, operating costs can exceed pneumatic alternatives.
Safety Systems: Your First Line of Defense
Every quality nail gun incorporates multiple safety mechanisms designed to prevent accidental discharge. Understanding these systems isn’t just about avoiding injury—it’s about maintaining control and precision in your work.
Contact Safety Tips
The contact safety tip must be fully depressed against your work surface before the gun can fire. This serves two critical functions:
- Prevents accidental discharge if you accidentally pull the trigger
- Ensures proper nail depth by maintaining consistent gun position
Critical Safety Note: Never disable or tape down the safety contact. I’ve seen too many accidents from this dangerous shortcut.
Trigger Lock Mechanisms
Modern nail guns feature trigger locks that prevent firing when engaged. Always engage this lock when:
- Loading nails
- Adjusting settings
- Moving between work locations
- Taking breaks
Depth Adjustment Systems
Proper depth control ensures nails sit flush with your material surface without over-driving. Most guns offer tool-free depth adjustment through:
- Rotating depth wheels (most common)
- Sliding depth gauges (less common but more precise)
- Electronic depth control (high-end models only)
Common Mistakes That Cost Time and Money
Mistake #1: Wrong Nail Selection
Using incompatible nails is the fastest way to jam your gun or create weak joints. Each nail gun specifies:
- Nail gauge (thickness)
- Length range
- Head style (clipped, offset, full round)
- Shank type (smooth, ring, twisted)
Solution: Always consult your manual’s nail compatibility chart. When in doubt, contact the manufacturer—most have excellent technical support.
Mistake #2: Inadequate Air Pressure (Pneumatic Systems)
Too little pressure causes incomplete nail driving; too much pressure over-drives nails or damages materials. Start at the manufacturer’s recommended PSI and adjust in 5-10 PSI increments while testing on scrap material.
Mistake #3: Poor Gun Maintenance
Neglecting regular cleaning and lubrication leads to:
- Inconsistent firing
- Increased jam frequency
- Premature component failure
- Voided warranties
Solution: Clean your gun after every use and follow the manufacturer’s lubrication schedule religiously.
Mistake #4: Ignoring Material Density Changes
Switching from pine to oak without adjusting settings results in incomplete driving or material damage. Always test on scrap material when changing wood species or nail sizes.
Mistake #5: Improper Angle Technique
Holding the gun at the wrong angle causes:
- Nails to bend or break
- Uneven nail depth
- Surface damage to finished materials
Solution: Maintain perpendicular contact with your work surface unless specifically angling for toenailing applications.
Essential Tools and Materials for Nail Gun Success
For Pneumatic Systems
- Air compressor (minimum 4-6 gallon tank for intermittent use)
- Air hose (¼” diameter minimum, 25-50 foot length)
- Quick-connect fittings for easy gun changes
- Inline oiler for automatic lubrication
- Pressure regulator with gauge for precise control
For All Nail Gun Types
- Safety glasses (non-negotiable)
- Hearing protection (especially important with pneumatic systems)
- Compatible nails in various lengths for different applications
- Gun oil specifically designed for nail guns
- Cleaning brushes for magazine and driver maintenance
- Adjustment tools (usually included with gun)
Material Preparation Tools
- Stud finder for accurate fastening into structural members
- Speed square for marking consistent nail placement
- Scrap material for testing settings and practicing technique
- Work clamps for securing materials during fastening
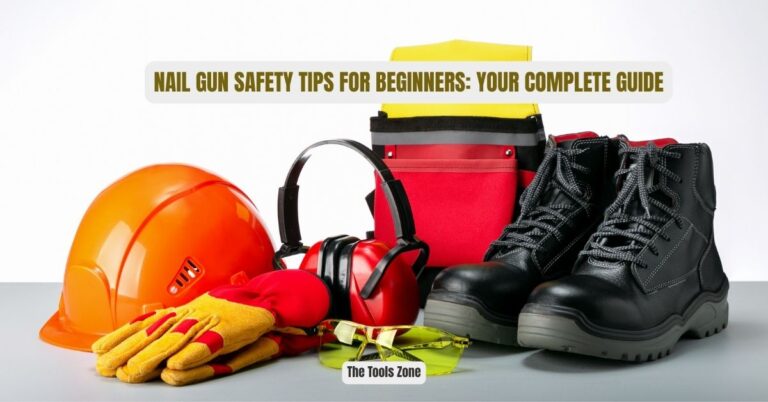
Pro Safety Considerations Every User Must Know
Personal Protective Equipment
Beyond basic safety glasses, consider these additional protective measures:
- Work gloves with palm padding to reduce vibration fatigue
- Steel-toed boots if working on construction sites
- Dust masks when working with treated lumber or creating sawdust
Work Area Safety
- Clear your work area of debris that could cause trips or falls
- Secure loose clothing that might catch on air hoses or power cords
- Maintain good lighting to ensure accurate nail placement
- Keep bystanders at least 10 feet away during operation
Firing Technique Safety
Never fire a nail gun into:
- Knots that might deflect the nail unpredictably
- Previous nail locations where nails might collide
- Thin materials without adequate backing
- Your hand or any body part (surprisingly common mistake)
Emergency Procedure: If a nail gun jams, immediately disconnect power (air hose, battery, or cord), engage the trigger lock, and consult your manual before attempting to clear the jam.
Frequently Asked Questions
Q: How do I know if my nail gun has enough power for my project?
The power requirement depends on your material and nail size. For reference: softwood framing requires 80-100 PSI (pneumatic) or 18V+ (cordless), while hardwood flooring needs 90-120 PSI or 20V+ cordless systems. If nails aren’t seating flush consistently, you need more power.
Q: Can I use any brand of nails in my nail gun?
Not necessarily. While gauge and length matter most, head style and shank design vary between manufacturers. Stick with nails specifically approved for your gun model to avoid jams and ensure optimal performance. Generic nails may fit but could cause reliability issues.
Q: Why does my nail gun double-fire occasionally?
Double-firing typically indicates worn internal seals (pneumatic guns), low battery voltage (cordless), or trigger mechanism wear. This is a safety concern that requires immediate attention—stop using the gun and have it serviced by a qualified technician.
Q: How often should I clean and maintain my nail gun?
Clean your nail gun after every use, including magazine clearing and driver area cleaning. Lubricate according to manufacturer specifications—typically every 5,000 shots for pneumatic guns, or whenever operation seems sluggish. Annual professional servicing ensures optimal performance.
Q: What’s the difference between sequential and contact firing modes?
Sequential firing requires you to place the safety tip first, then pull the trigger for each nail—safer but slower. Contact firing lets you hold the trigger and “bounce” the safety tip for rapid nailing—faster but requires more skill and caution. Beginners should start with sequential mode.
Q: Can I adjust nail depth while the gun is loaded?
Most modern nail guns allow depth adjustment while loaded, but always engage the trigger lock first. Some older models require complete unloading before adjustment. Consult your specific manual and always prioritize safety over convenience.
Q: Why do my nails keep jamming in the magazine?
Common jam causes include: using incompatible nail sizes, damaged magazine springs, debris in the feed mechanism, or bent nails in the strip. Always use manufacturer-approved nails, keep the magazine clean, and inspect nail strips before loading.
Key Takeaways: Mastering Your Nail Gun
Understanding how your nail gun works transforms you from a tool user into a craftsman. The key is matching the right tool to your specific needs—pneumatic for heavy-duty work, electric for convenience and consistency, and gas-powered for maximum portability.
Remember these essential points:
- Safety systems exist for a reason—never bypass them
- Proper maintenance prevents problems before they start
- The right nails make all the difference in performance and results
- Practice on scrap material builds confidence and prevents costly mistakes
- Power requirements vary significantly between materials and applications
Whether you’re installing crown molding, building a deck, or tackling your first framing project, a properly understood and maintained nail gun will serve you for decades. The investment in learning these systems pays dividends in every project you complete.
Ready to Choose Your First Nail Gun?
Now that you understand the inner workings of nail gun technology, you’re equipped to make an informed decision. Consider your primary applications, workspace limitations, and budget constraints. Remember—the best nail gun is the one that matches your specific needs and skill level.
What’s your next project? Share your nail gun questions or experiences in the comments below. I read every comment and love helping fellow DIYers choose the right tools for their goals.