
Variable-Speed Corded Drills: Why Speed Control Matters for You
Variable-speed corded drills allow you to match the turning speed to the material rather than running at a fixed rate. By using a trigger switch to control motor power, you can achieve cleaner holes, reduce surface damage, and extend the life of your drill bits.
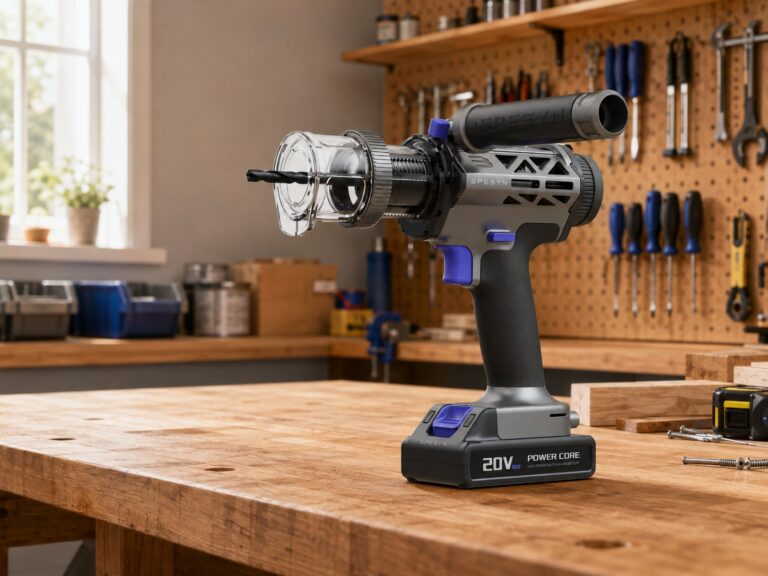
Parts of a variable-speed corded drill
| Part or input | What it does | What you notice when it goes wrong |
|---|---|---|
| Variable-speed trigger | Controls motor speed by how far you press it | Speed jumps or won’t slow down |
| Reversing switch | Changes rotation direction for drilling or removing screws | Drill spins the wrong way |
| Speed range selector | Locks the drill into low or high speed bands | Low-speed setting still runs too fast |
| Motor | Turns the chuck and bit at the chosen speed | Loss of power or strange noises |
| Chuck | Grips the drill bit or driver | Bit slips or wobbles during use |
If you notice the chuck wobbling, stop immediately. A loose chuck often stems from a bent spindle rather than the chuck itself. Replacing the chuck is inexpensive compared to the alternative, but a bent spindle usually requires a new drill.
When the trigger becomes erratic, blow out the housing with compressed air. Dust accumulation often mimics a failing switch. If the speed still jumps after cleaning, the internal potentiometer has worn out.
Always check the speed selector position before pulling the trigger. Forcing a drill to start while the selector is stuck between gears strips the internal teeth. If you feel resistance, rotate the chuck by hand while gently nudging the switch. This aligns the internal gears and prevents costly mechanical failure.
Distinguish between a failing motor and worn carbon brushes. If the drill sparks excessively or smells like ozone, replace the brushes first. This inexpensive fix often restores full power, whereas a burnt motor winding necessitates a total replacement.
How speed control works
Press the trigger slightly to start the motor at low speed, which takes less than a second.
Increase trigger pressure to raise the speed through the low range, usually up to about 1,000 rotations per minute on many models. Use this setting for driving screws into hardwood to prevent stripping the heads.
Engage the speed range selector to shift into the high band for faster work, often reaching roughly 3,000 rotations per minute depending on the drill. Reserve this high setting exclusively for drilling small holes through soft materials like pine or drywall.
Release the trigger to let the motor coast to a stop, which usually takes a few seconds. Don’t force the chuck to stop with your hand, as this risks internal motor strain.
Flip the reversing switch only after the chuck has fully stopped to avoid gear damage. If you hear a grinding noise, you have moved too quickly.
Match the speed and range to the material before each new hole or screw. Always start slow to ensure the bit bites firmly before accelerating.
Why speed control matters for your drill
The first thing to understand is that speed control isn’t a convenience feature. It’s what keeps a drill from destroying the material it’s working on. When a bit spins too fast for the material, friction builds heat at the cutting edge.
That heat can burn wood, melt plastic, or soften the temper on a metal bit so it dulls after only a few holes. A slower speed lets the cutting edge remove material without overheating, which is why wood and plastic almost always call for the low range.
The same principle applies when driving screws. High speed makes it easy to strip the screw head or drive the fastener too deep, especially in softwood. Slowing the drill gives you control over how far the screw goes in and when to stop. It also reduces the chance that the bit slips out of the screw head and gouges the surface around it.
Metal drilling sits at the other end of the scale. A large hole in steel needs slow speed and steady pressure so the bit can cut rather than skate across the surface. Small holes in thin metal can use higher speed, but the rule stays the same: the harder the material and the larger the bit, the slower the turning should be.
This is also where corded drills differ from many cordless models. Because a corded drill draws power straight from the wall, it can hold low speed under load without the motor bogging down the way a battery-powered drill sometimes does. That steady torque at low speed is exactly what makes variable-speed corded drills useful for tough jobs like mixing paint or driving large fasteners.
What you control and what is fixed
Things you control
- How far you press the trigger, which sets the speed within the selected range.
- Whether you use the low or high speed range for the job.
- When to start and stop the drill, and how quickly you release the trigger.
- Which direction the chuck turns, set with the reversing switch.
- The amount of downward pressure you apply while drilling.
Things fixed by design
- The motor’s maximum speed in each range, printed on the drill’s specification plate.
- The chuck size, which limits the largest bit shank the drill can hold.
- The power cord length, which decides how far from an outlet you can work.
If a job needs a speed lower than the drill’s lowest setting, or a bit larger than the chuck rating, stop and get the right tool. Forcing a drill beyond its design limits can burn out the motor or snap a bit, and that’s a repair or replacement cost you can avoid.
Getting better results from your drill
Start every job at the lowest speed and increase only if the material allows it. This gives you a moment to check that the bit is centered and cutting cleanly before full speed takes over. Use the low range for wood, plastic, and screw driving, and reserve the high range for small bits in metal or masonry where speed helps the cutting action.
Match the bit size to the speed. Large bits need slower rotation because more of the cutting edge contacts the material at once, which creates more heat. Small bits can turn faster, but only if you keep steady pressure so the tip doesn’t wander. Let the drill do the work instead of forcing it downward.
Release the trigger fully between holes. Stopping the motor between cuts prevents unnecessary heat buildup. Stopping between cuts lets it cool and saves energy over a long work session.
Check the chuck before each use. A loose chuck lets the bit wobble, which makes holes larger than intended and wears the bit unevenly. Tighten it by hand or with the chuck key, depending on the model, and give the bit a gentle tug to confirm it’s seated.
Related guides
- Choosing a Corded Drill for Metal: Speed, Bits & Setup
- Corded Drill Buying Guide: Amps, Chuck Size, Speed & Features
- 10 Best Corded Hammer Drills for Home Projects and Masonry
Frequently asked questions
Can I use one speed for everything?
No. Different materials and bit sizes need different speeds, and using one setting risks burning wood, dulling bits, or stripping screws.
Why does my drill slow down when I press hard?
The motor is working under load, which is normal; if it stops completely, the bit may be binding or the drill may be underpowered for the task.
How long should I run the drill at low speed?
Run at low speed only as long as the material needs it, often just seconds per hole, and stop sooner if the bit or material gets hot.
Is it safe to change direction while the drill is still spinning?
No. Wait until the chuck stops completely before flipping the reversing switch, or you can damage the gears.
What happens if I use high speed in wood?
The bit can overheat and burn the wood, and the hole may come out rough or oversized.
Does cord length affect drill speed?
No. Cord length doesn’t change speed, but a very long or thin extension cord can reduce power delivery to the motor.
Conclusion
Speed control turns a drill from a single-purpose tool into one that matches the job. Use the trigger and range selector deliberately, respect the limits printed on your drill, and the tool will last longer while your work comes out cleaner.
2 Comments