

Trim Router vs. Plunge Router: Differences and Which to Buy
The differences between a trim router and a plunge router determine which tool to buy for your specific uses. A trim router is best for light edge work and small tasks because of its compact size, while a plunge router is the better choice for deep cuts and complex joinery. If you need to make repeated cuts into the middle of a board, choose a plunge router; if you are only rounding over edges, a trim router will save you time and effort.
Comparing wood router types

Choosing the right tool depends on your specific project needs and the depth of the cuts required. Trim routers are lightweight and easy to control with one hand, making them ideal for laminates and small decorative profiles. In contrast, plunge routers offer more power and allow you to lower the bit into the wood while the base stays flat on the surface.
| Method | How long | Effort | Cost | Best for |
|---|---|---|---|---|
| Trim router | Short | Low | Low | Edging |
| Plunge router | Medium | High | High | Joinery |
| Fixed base | Medium | Medium | Medium | Grooves |
Always check the power tool safety guidelines provided by the Consumer Product Safety Commission before operating any high-speed rotary tool. Using the wrong tool for a heavy task often leads to burning the wood or losing control of the router, which can damage your workpiece permanently.
Using a trim router for edges
Trim routers excel at small, detail-oriented work. To use one, follow these steps:
- Select a bit with a pilot bearing for edge routing.
- Adjust the depth so the cutter sits flush against your guide.
- Hold the router firmly with one hand and keep the base flat.
- Move the tool against the rotation of the bit for a clean cut.
This tool is perfect for rounding over edges or trimming veneer after you have glued it down. It’s light enough to maneuver quickly, but it lacks the power for deep mortises or large bits. If you try to use a trim router for heavy-duty work, you’ll likely overheat the motor or stall the bit, which often ruins the wood surface.
Performing deep cuts with a plunge router
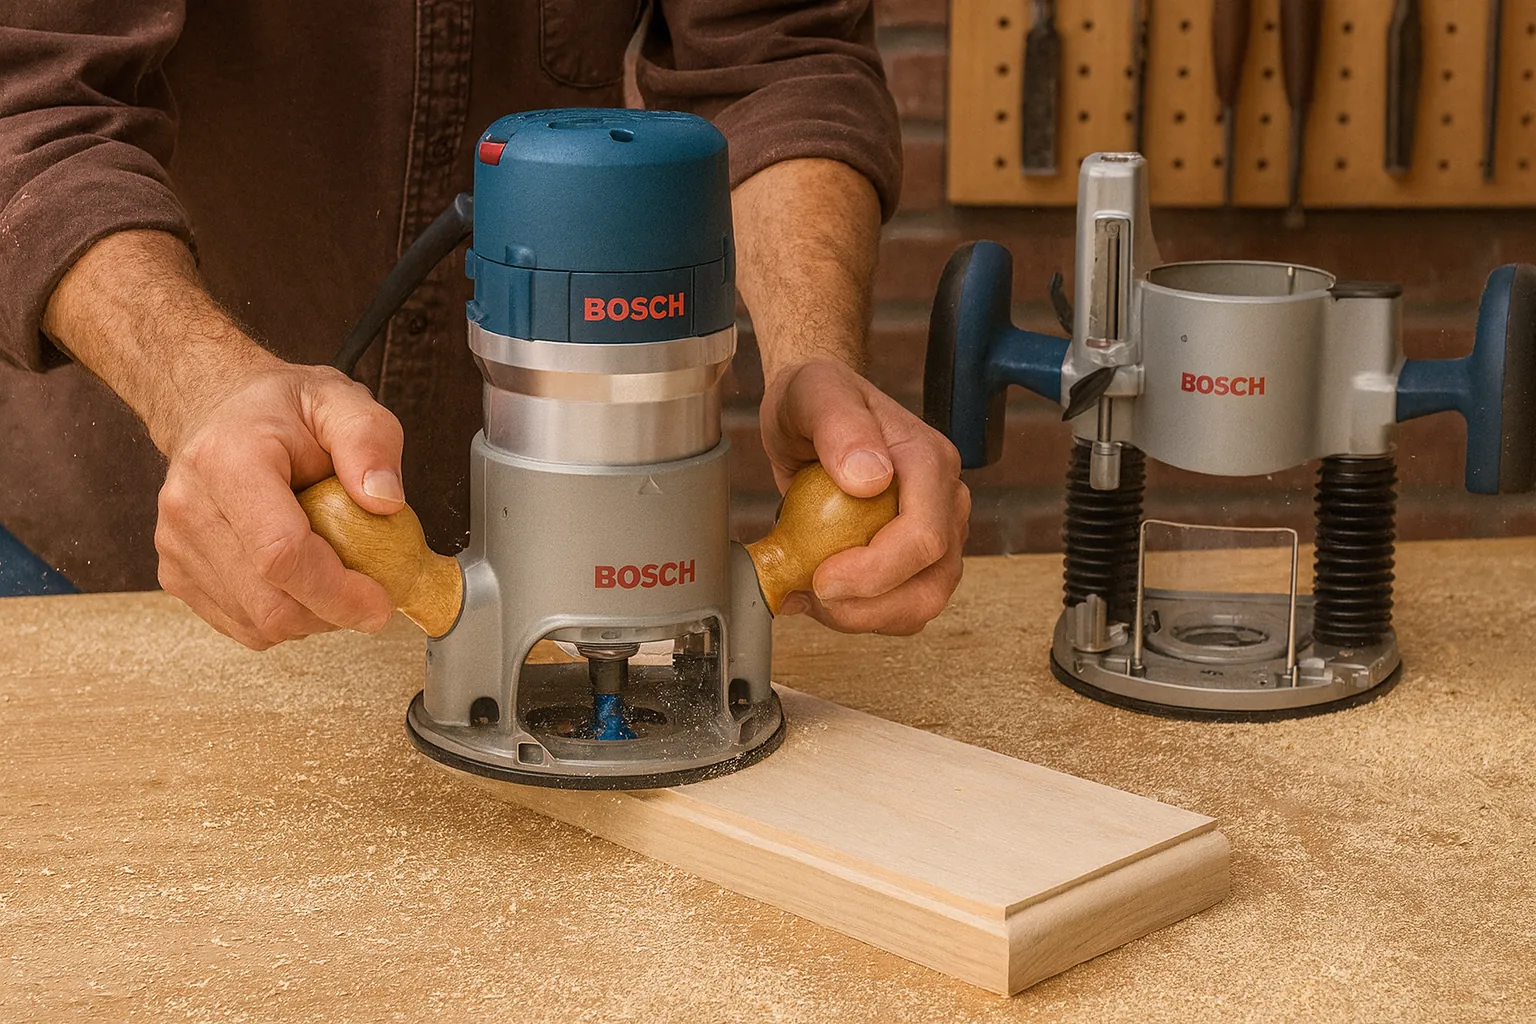
Plunge routers provide the stability needed for complex work that requires starting a cut in the middle of a board. Follow these steps for safe operation:
- Set the depth stop to the exact measurement required for your cut.
- Place the base firmly on the wood before you turn it on.
- Push the motor housing down slowly until the bit reaches the set depth.
- Lock the plunge mechanism if you need to make a long, consistent groove.
These routers are essential for cutting mortises, dados, and deep decorative patterns. They offer great precision, but they’re heavy and bulky. If you’re a beginner, the weight of a plunge router can make it difficult to maintain a straight line on thin pieces of wood.
Using fixed base routers for grooving
Fixed base routers are a middle ground for woodworkers who need steady support for repetitive tasks. Unlike the plunge model, the depth of a fixed base is set before you start the router. Use these steps to achieve consistent results:
- Unplug the router and set the bit height on a flat bench.
- Tighten the locking knob securely so the motor doesn’t shift.
- Place the base on the workpiece and turn the power on.
- Slide the router across the wood to create your groove or rabbet.
This method is excellent for cabinet making and light joinery where you don’t need to change the depth often. The main limitation is that the bit must be retracted or the router lifted to clear the wood, which can leave a mark if you aren’t careful. Some users prefer to buy a kit that includes both a fixed and a plunge base for one motor.
Selecting the right tool for your project
When you’re in a hurry to finish a simple edge, a trim router wins because it’s fast to set up and easy to move. If you’re doing this for the first time, a trim router is also safer and more manageable for small projects. However, if you want the best possible result for deep joinery or complex furniture, a plunge router is the only choice that provides the necessary depth control.
The trade-off is between portability and power; the trim router is highly portable but lacks the depth control of a plunge model. Always consult your owner’s manual to understand the tool’s plunge depth capacity and recommended bit sizes. Always check this limit before you attempt a deep cut, as exceeding it can result in vibration and poor cut quality.
Essential safety and maintenance rules

Regardless of the tool you choose, you must always follow a few universal rules. First, ensure the collet is clean and the bit is tightened to the manufacturer’s torque specification to prevent the bit from slipping. Second, always feed the router against the direction of the bit’s rotation to maintain control. Third, use hearing protection and safety glasses at all times while the motor is running.
If you’re unfamiliar with these tools, seek help from a professional or a local woodworking club. If you notice the wood burning, you’re moving too slowly or your bit is dull; stop immediately to prevent a fire hazard or damage to your project.
Related guides
- Cordless vs. Corded Trim Routers: Which Makes More Sense?
- 10 Best Trim Routers for Woodworking: Our Top Shop Picks
- Best Cordless Trim Routers for Woodworking: Expert Guide
Frequently asked questions
Can I use a trim router for mortises?
No, a trim router is generally not powerful enough for deep mortises. The small motor will likely stall if you try to cut too deep, and the base is often too small to provide the stability required for such a precise joinery task. Use a plunge router for these deep, interior cuts.
How long does a router bit last?
A high-quality carbide-tipped router bit typically lasts for several hundred linear feet of hardwood before it needs sharpening. This figure assumes you’re using the correct feed rate and not forcing the tool through the material. You can check the condition of your bit by looking for signs of burning on the wood.
Is it safe to use a router without a dust collector?
It’s safe to operate a router without a dust collector, but you should always wear a N95-rated dust mask to avoid inhaling fine wood particles. The high speed of the bit creates a large amount of airborne dust, which can irritate your lungs and block your view of the cut line.
What happens if I move the router too fast?
If you move the router too fast, the bit will leave “chatter” marks or ripples on the surface of the wood. This happens because the cutting edges don’t have enough time to remove the material properly. Slow your feed rate to get a smooth, clean finish on your workpiece.
How do I stop the router from burning the wood?
You stop burning by keeping the router moving at a consistent speed and ensuring your bit is sharp. Burning occurs when the friction from a dull bit or a slow feed rate chars the wood fibers. Check the bit for resin buildup and clean it with a solvent if you see dark spots.
Can I change the speed of my router?
Yes, many routers include a variable speed dial that allows you to adjust the RPM based on the size of the bit. Larger bits require slower speeds to stay safe and prevent vibration, while smaller bits can run at higher speeds for a cleaner finish. Check your manual for the recommended setting.
Conclusion
Choosing the right tool depends entirely on the projects you’re planning next. If you’re just starting out, grab a trim router to practice your edge work on scrap wood. Once you’re comfortable, you’ll find that adding a plunge model to your workshop really opens up a new world of creative possibilities.


One Comment