How to Cut Crown Molding With a Miter Saw: Flat and Nested Methods
You can successfully complete how to cut crown molding with a miter saw (flat and nested methods) by choosing the orientation that matches your saw’s capacity and your comfort level. The flat method works best for wide molding, while the nested method is ideal for smaller boards if your saw allows it.
Deciding between flat and nested miter cuts
This guide serves homeowners who have a compound miter saw and want to install decorative trim. You likely have a project ready to start, but you’re unsure which orientation keeps the wood stable during the cut.
We assume you have a saw with at least a 10-inch blade and basic safety gear. The flat method is easier for beginners because it keeps the wood against the saw bed, reducing shifting. If you have a professional-grade saw with deep depth-of-cut capacity, you might prefer the nested method.
Factors Affecting Your Cut
The width of your molding is the primary factor. Use the flat method if the board exceeds your saw’s vertical capacity. You can check your manual to find the maximum vertical clearance for your specific model.
Your saw’s bevel capability also changes the process. Most saws lock into common angles, but you should verify these on the saw’s scale.
The material density matters, too. Cut dense hardwood slowly to prevent blade deflection.
Steps for Accurate Molding Cuts
- Measure your wall angle with a digital protractor to ensure it’s exactly 90 degrees.
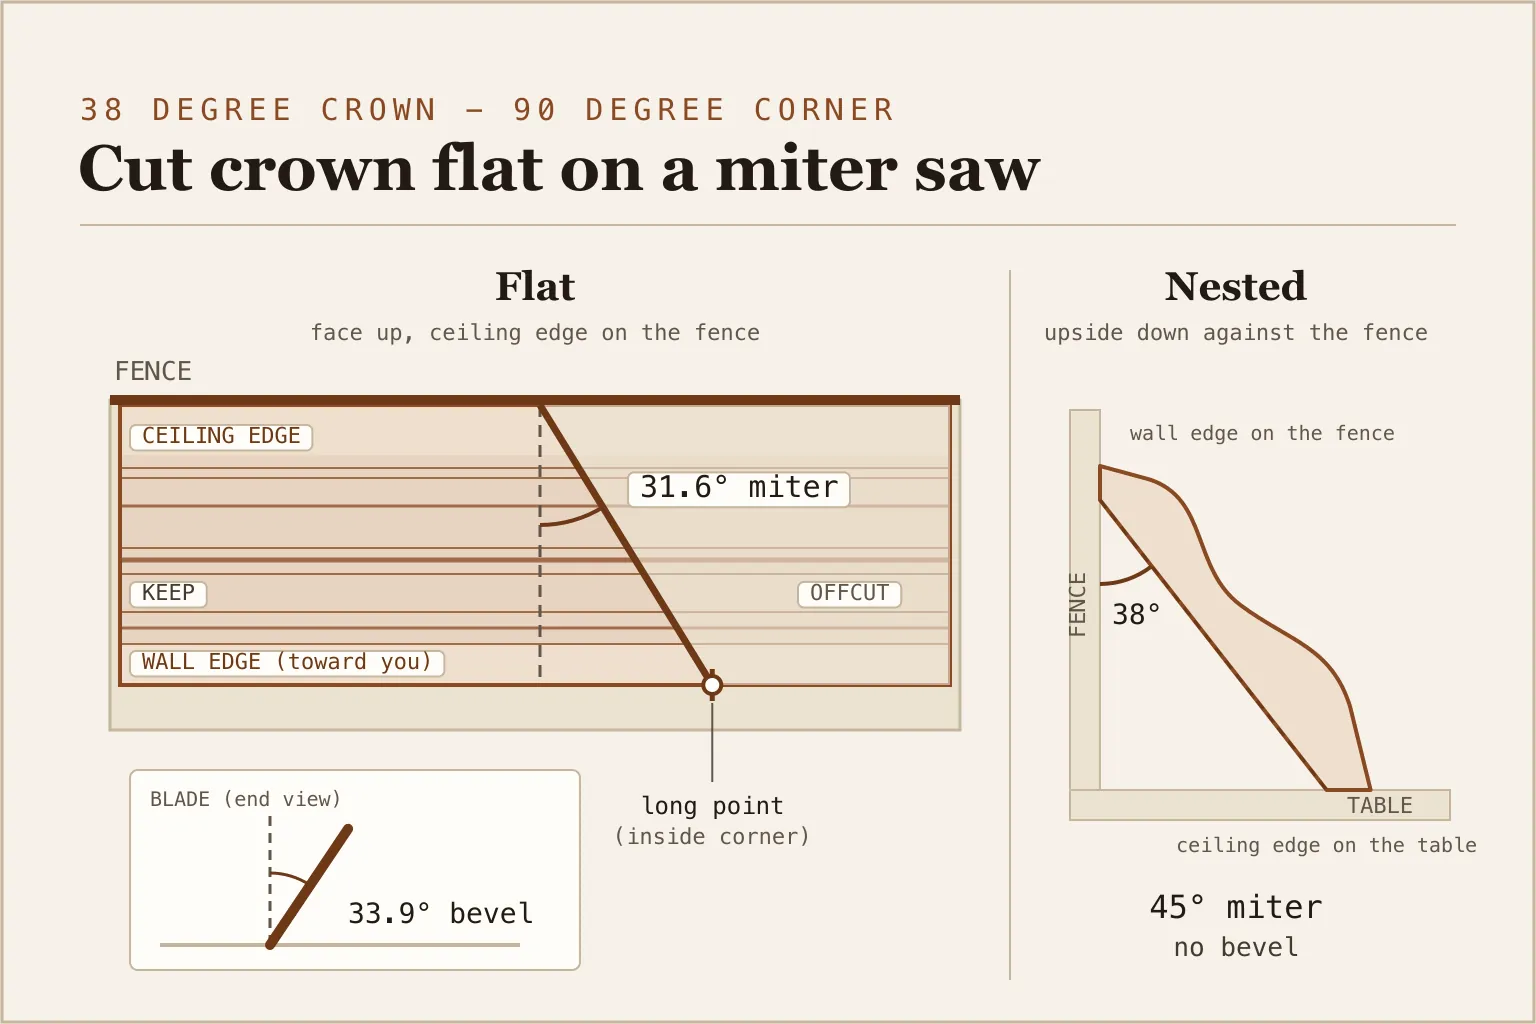
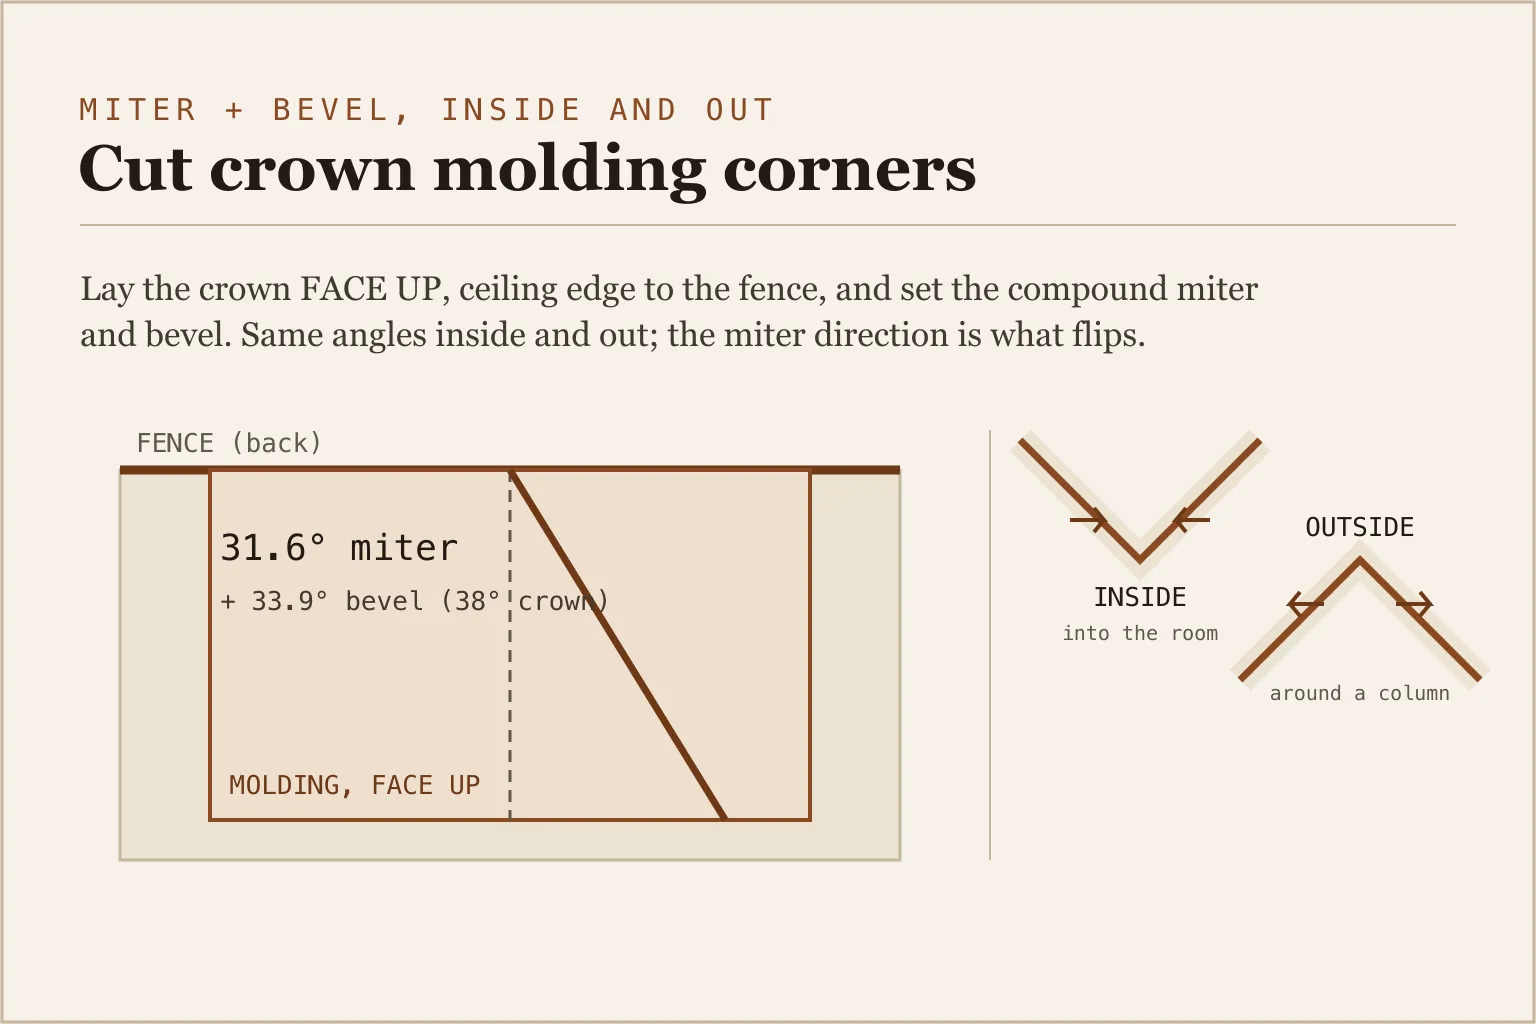
- For the flat method, lay the molding flat on the saw bed with the top edge against the fence.
- Set your miter and bevel angles according to the Crown Molding Miter and Bevel Chart provided by the International Association of Certified Home Inspectors.
- Secure the molding with a clamp to prevent it from sliding during the cut.
- Lower the blade slowly, letting the saw reach full speed before touching the wood.
- For the nested method, place the molding upside down at the same angle it will sit on the wall.
- Use a crown stop or a scrap piece of wood to keep the molding at the correct spring angle.
- Cut the piece while keeping firm pressure against the fence.
- Check the fit against a scrap piece before cutting your final length.
Confirm the spring angle. Test settings on scrap wood to verify the joint fits before cutting finish trim.
Comparing flat and nested crown molding miter saw cutting methods
| Situation | Best Method | Effort Level | Watch For |
|---|---|---|---|
| Wide molding | Flat | Medium | Blade deflection |
| Narrow molding | Nested | High | Shifting wood |
| Tight corners | Either | High | Angle accuracy |
| Limited space | Nested | Low | Fence clearance |
| Hardwood material | Flat | Medium | Burning wood |
Achieving Professional Results
Preparation and Setup
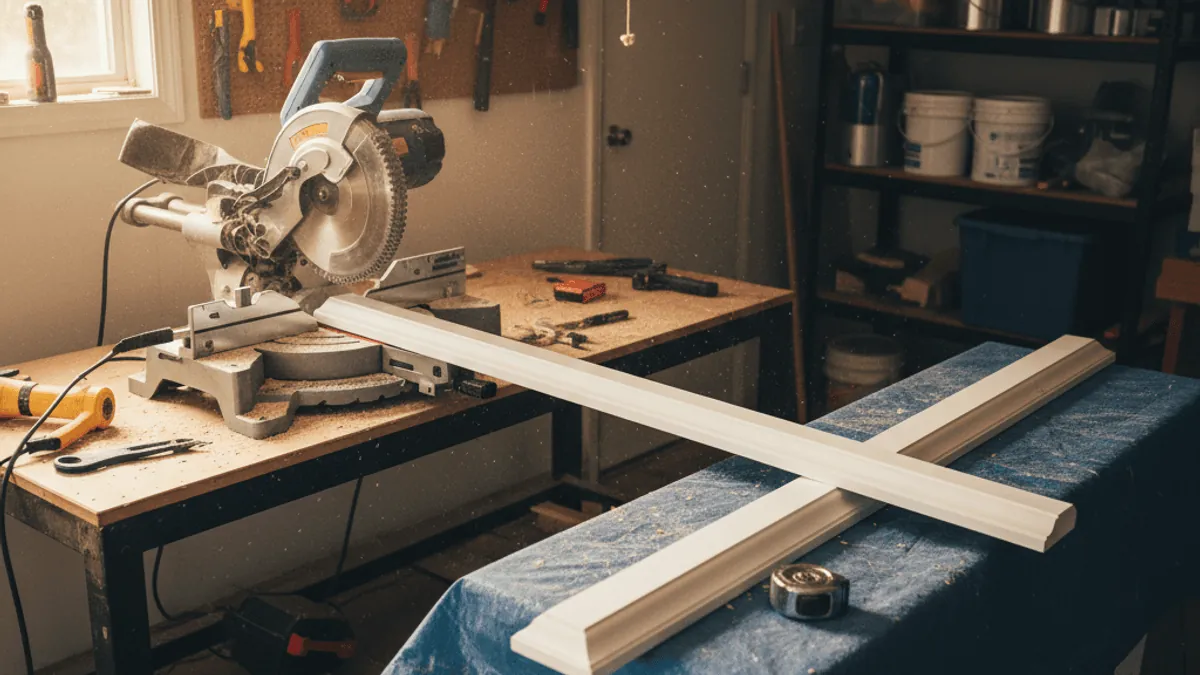
Always support long pieces of molding with rollers or blocks. Experienced installers use a sacrificial fence made of MDF to prevent splintering on the back side of the cut.
Execution and Precision
Keep hands at least six inches from the blade. If the blade struggles, clean resin buildup from the teeth with solvent.
Troubleshooting Common Issues
| What you notice | What it usually means | What to do first | Stop it happening again |
|---|---|---|---|
| Gaps in corners | Wrong angle | Re-check protractor | Use a crown stop |
| Splintered edges | Dull blade | Change the blade | Use a zero-clearance insert |
| Uneven joints | Wood shifted | Clamp the piece | Improve support |
| Burn marks | Dull blade or slow feed | Use sharp blade | Maintain steady feed rate |
| Blade wanders | Too much pressure | Let saw work | Cut in two passes |
Safety and Standards
Follow Consumer Product Safety Commission guidelines for power tool usage. Never remove manufacturer blade guards, as they prevent accidental contact. If uncomfortable with compound cuts, use a coping saw for safer, more accurate joints.
The Cost of the Job
Molding cost varies by material. MDF is the cheapest, while solid hardwood can cost three times as much per foot. Buy 15% extra material to account for mistakes. If you’re unsure of current prices in your area, check your local building supply store’s website to compare the cost of MDF versus pine or oak options.
Maintaining Your Results
Store leftover molding flat in a climate-controlled room to prevent warping. Fix small gaps with paintable caulk or wood filler. If a corner separates significantly, check if the nails have pulled loose; you may need to add a finish nail or a dab of adhesive to secure it.
When to Seek Professional Help
Standard angle settings fail if walls aren’t plumb or square. Professionals use coping for inside corners to ensure a tighter fit. If you’re working with expensive hardwood or have many complex angles, hire a finish carpenter.
Related guides
- Best Nailer for Crown Molding: Top Picks for Precision and Durability
- 10 Best Miter Saw Blades: Expert Picks for Quality Cuts
Frequently Asked Questions
Can I cut crown molding without a compound miter saw?
You can use a coping saw to cut the profile of one piece to fit the face of another, which creates a tighter joint than a standard mitered corner.
How long does it take to cut a full room?
It takes about two to four hours for a standard room, depending on how many corners you have and how much time you spend testing your angles on scrap.
Is it safe to cut crown molding flat?
It’s safe if you use clamps to secure the wood to the fence, as this prevents the molding from sliding or vibrating during the saw’s operation.
What happens if my corners are not 90 degrees?
You must divide the actual wall angle by two and set your saw to that result, otherwise, your joints won’t close properly at the corner.
Does it matter if I use MDF or wood?
It matters because MDF is easier to cut but prone to splintering, while solid wood is more durable but requires a sharper blade to prevent burning the edge.
How many extra feet of molding should I buy?
You should buy 15% more than your total wall length to account for mistakes, off-cuts, and the need for longer pieces to avoid ugly joints in the middle.
Measure your wall angles first to determine the exact settings for your saw.
Conclusion
Once you’ve finished your test cuts and feel confident, it’s time to start installing your pieces. Don’t worry if you make a small mistake; it’s just part of the learning process. Grab your nail gun and some wood filler, and you’ll have those beautiful, professional-looking corners ready in no time at all.