
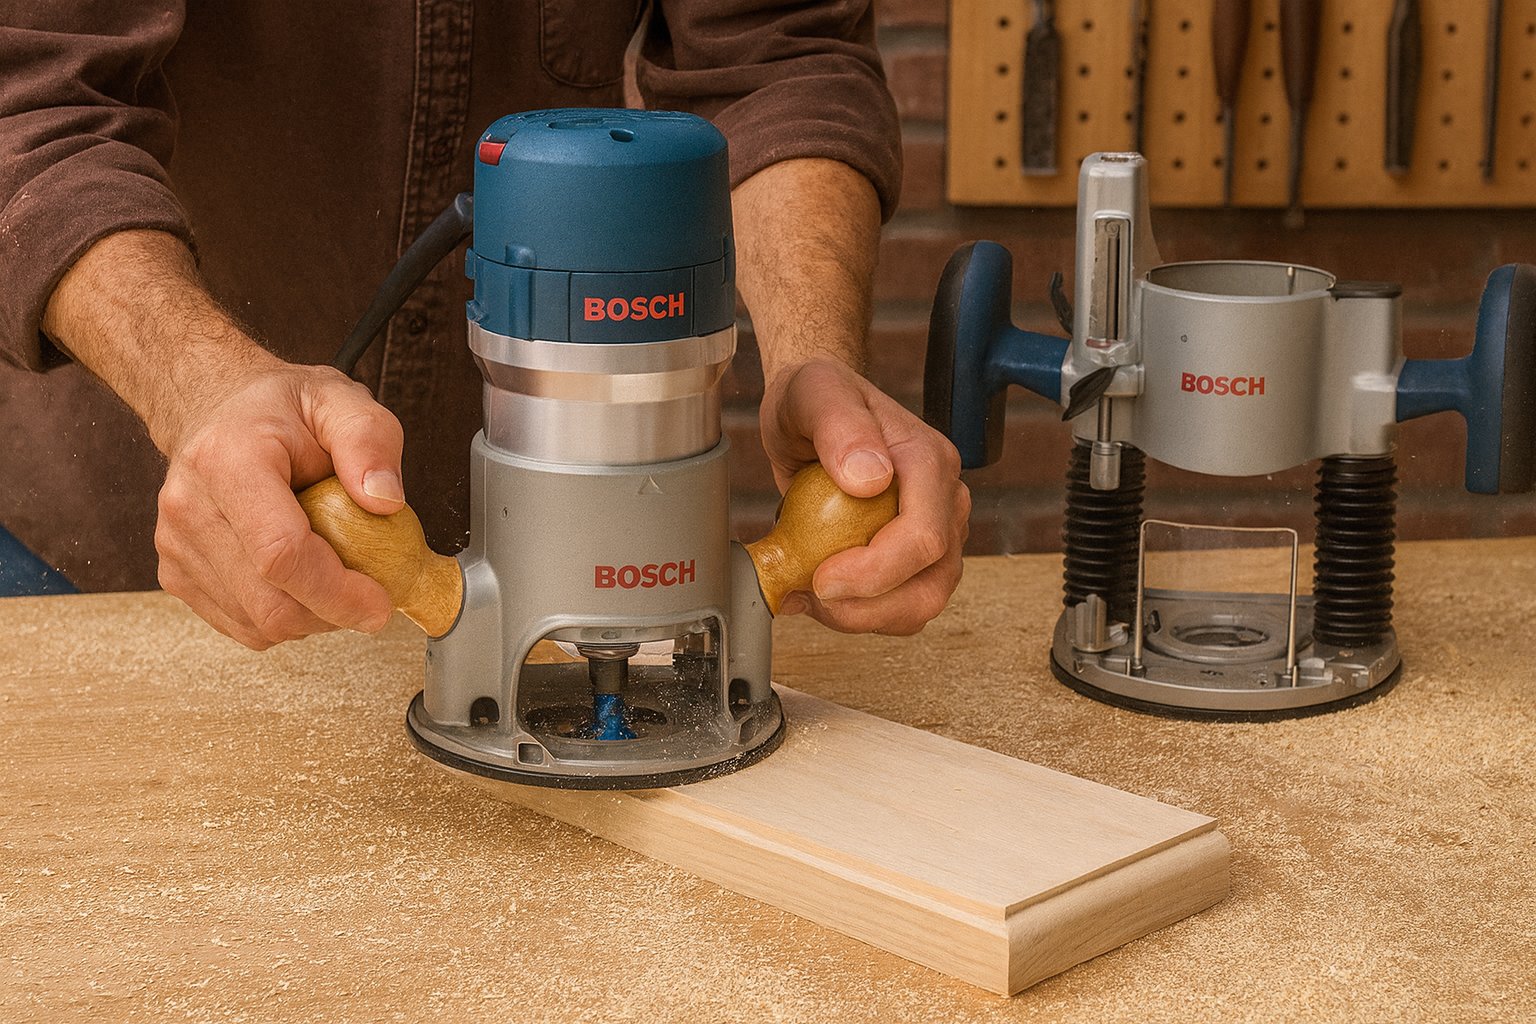
Fixed-Base vs Plunge Router: Which One Do You Need?
A fixed-base router is the best choice for edge work and mounting in a table, while choosing between a fixed-base vs plunge router depends primarily on whether you need to start cuts in the middle of a board. If you prioritize precision in repeat tasks, use a fixed-base model; if you need to lower the bit into the wood safely, use a plunge router.
Comparing router types for your shop

Choosing the right tool depends on your specific woodshop goals, as each design serves a unique purpose. The following table breaks down the core differences to help you decide which tool fits your workflow.
| Method | How long | Effort | Cost | Best for |
|---|---|---|---|---|
| Fixed-base | Fast | Low | Low | Edging |
| Plunge | Moderate | Medium | High | Inlays |
| Combo kit | Varies | Medium | Medium | Versatility |
If you’re a beginner, buy a combo kit to get both bases; if you have a tight budget, pick the fixed-base model first. The main trade-off is between the ease of setup for edge profiles and the mechanical ability to perform internal cutouts.
Using a fixed-base router
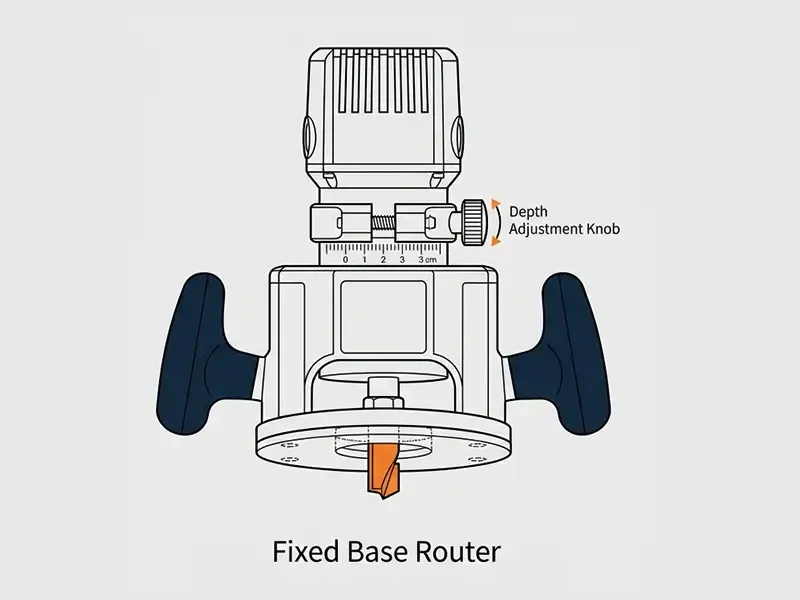
This tool features a base that locks at a set depth, making it ideal for tasks where the bit stays at the same position. It’s favored for its stability and ease of adjustment when mounted under a router table.
- Unplug the tool and install your chosen bit into the collet.
- Adjust the depth by turning the motor housing until the bit reaches the desired height.
- Tighten the locking lever firmly to prevent the motor from moving during the cut.
- Push the tool along the edge of your workpiece at a steady, constant speed.
This setup is excellent for edge profiles like round-overs or chamfers because it keeps the bit perfectly vertical. However, its main weakness is that you can’t lower the bit into the wood; you must start your cut from the edge of the board.
Using a plunge router

A plunge router allows you to lower the spinning bit vertically into the wood while the base stays flat on the surface. This is essential for work that doesn’t start at an edge, such as cutting mortises or decorative grooves.
- Set the depth stop to the exact measurement required for your cut.
- Turn on the motor while holding the tool firmly against the wood surface.
- Push down on the handles to lower the bit into the material until it hits the stop.
- Lock the plunge mechanism if you need to make a long, consistent groove.
- Release the lock to let the spring retract the bit safely away from the surface.
This tool is superior for stop-cuts and internal patterns. Its only real limit is the weight and complexity; the spring mechanism makes it heavier and harder to maneuver than a simple fixed-base unit.
Using a combo router kit
A combo kit provides one motor that fits into two different bases, giving you the best of both worlds. This is a smart way to save space in a small shop without sacrificing functionality.
- Remove the motor from the current base by opening the locking latch.
- Insert the motor into the alternative base until it clicks into place.
- Secure the motor using the latch or adjustment ring provided by the manufacturer.
- Perform your setup steps based on which base you have attached.
This method works well because you can leave one base in your router table and keep the other for handheld tasks. The downside is the extra time required to switch bases; if you find yourself swapping them every few minutes, you might eventually want two separate dedicated tools.
Choosing the right router for the job
When you’re in a hurry, a fixed-base router is the faster choice because it requires less setup time for simple edge work. If you’re doing this for the first time, a combo kit wins because it teaches you how both mechanisms function without needing two separate motors. If you want the best possible result whatever it takes, use a dedicated plunge router for internal work and a heavy-duty fixed-base for table-mounted jobs.
The main trade-off remains the same: you sacrifice the speed of the fixed-base for the internal cutting capability of the plunge model. You can find your exact figure on your project plans by checking if your cuts start at the edge or the middle of the material.
If your design requires stopped dados or mortises, you must use a plunge router to lower the bit safely into the wood. Beginners often try to tilt a fixed-base router into the surface, which causes the bit to grab and kick back. If the cut is internal, choose the plunge. If the cut is on the perimeter, choose the fixed-base.
The rules that apply to all routers
Regardless of the model you select, you must always prioritize safety and control. Before starting, check that your bits are sharp and free of rust, as dull bits cause the motor to labor and increase the risk of kickback.
Always wear hearing and eye protection, and ensure your workpiece is clamped securely to a stable surface before you start the motor. If you can wiggle the board by hand, it isn’t secure enough for a router.
Throughout the process, listen for changes in the motor pitch. If the sound drops, you’re moving too slowly or taking too much material, which can burn the wood. If you smell smoke, stop immediately and check for charred edges.
Always keep your hands clear of the bit path. Never remove the base plate while the tool is connected to power. If you’re using a plunge router, lock the depth stop before every pass. This prevents the bit from creeping upward and ruining your project dimensions.
Frequently asked questions
Can I use a fixed-base router for mortises?
No, you can’t effectively perform mortises with a fixed-base router because you can’t safely lower the bit into the center of the wood. You must start from an edge, which makes it impossible to create an internal slot without damaging the surface of your workpiece.
How long do router bits last?
The lifespan of a bit varies based on the hardness of the wood and the feed rate, but most carbide-tipped bits last for several hundred linear feet before needing a professional sharpening. You can check the condition of your bit by feeling for small nicks or dull edges along the cutting flute.
Is it safe to use a router without a dust port?
Yes, it’s safe to operate, but using a dust port is highly recommended to keep your workspace clear and improve your visibility. Without a port, dust piles up quickly and hides your layout lines, which often leads to mistakes or uneven cuts during the routing process.
What happens if I move the router too slowly?
If you move the tool too slowly, you’ll likely burn the wood because the friction of the bit generates excessive heat. This leaves dark, charred marks on the edge of your project that are often difficult to sand out without changing the shape of your profile.
How much power do I need for hardwood?
You should use a router with at least 2.0 horsepower for dense hardwoods like oak or maple to prevent the motor from stalling. If you’re working with softwoods like pine, a smaller 1.25-horsepower trim router is usually sufficient for most decorative edge work.
Do I need a variable speed control?
Yes, you need variable speed control if you plan to use bits of different diameters, as larger bits require slower speeds to operate safely. Running a large bit at the maximum RPM can cause excessive vibration and may result in the bit shattering during operation.
Conclusion
Proper setup and safety are the foundation of good woodworking, so take the time to learn your specific tool’s adjustments before you begin your first project. Always test your settings on scrap wood of the same thickness and density as your final piece to ensure the depth and speed are set correctly.

One Comment