How to Set the Depth on a Plunge Router: Step by Step Guide
You can determine the cutting depth on a plunge router by using the built-in depth stop rod and the turret gauge. To set this, you loosen the locking knob on the depth rod, lower the bit until it touches your material, and then lock the rod at your desired measurement. This process ensures precision for projects like dadoes or mortises.
Tools You Need for Router Calibration
To set your router depth, you must have the right gear ready on your workbench. Having everything in one place prevents you from losing your place during the setup.
- A plunge router with a functional depth rod and turret assembly.
- A set of digital calipers or a high-quality steel rule for measuring the bit extension.
- A flat, level surface for the router base to sit on while you work.
- A test piece of scrap wood that matches the thickness of your actual project material.
- The manufacturer’s manual for your specific tool, as adjustment knobs vary by brand.
- A set of router bits with sharp edges to ensure you don’t force the tool.
If you’re using a base plate accessory, ensure it’s securely attached before measuring, as it changes the effective bit length. If you don’t have the manual, look for the official support page on the manufacturer’s website to see specific diagrams for your model.
You can substitute a simple wooden block for a depth gauge, but you lose the accuracy required for fine woodworking. If your router requires a specific wrench for collet tightening, keep it handy, but never use it to force the depth rod, as this can strip the threads.
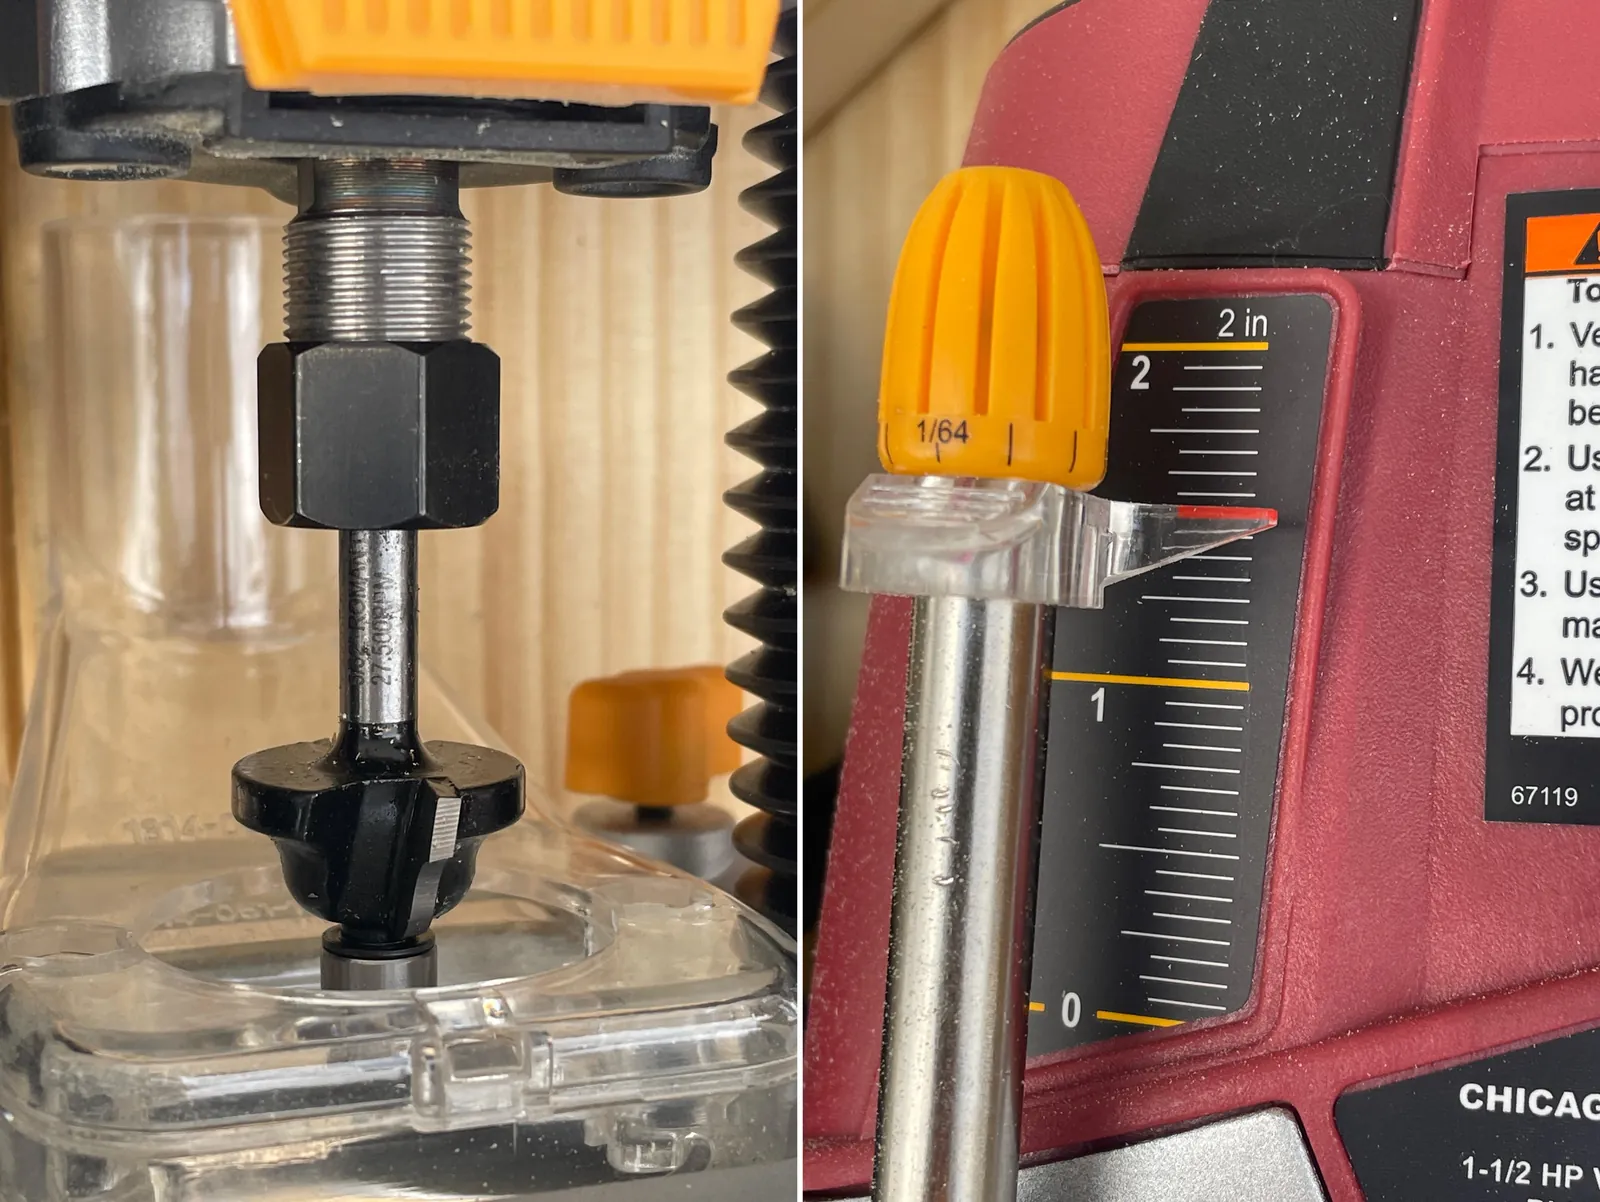
Calipers are the only way to verify a depth setting within a tolerance of 0.005 inches. If you rely on the router’s built-in scale, you’ll likely miss your target by a sixteenth of an inch due to parallax error. Use the calipers to measure the distance from the router base to the tip of the bit.
If you’re cutting a dado, use a scrap piece that’s exactly the same thickness as your final workpiece. If the scrap is even 1/32 of an inch thinner than your project wood, the bit will plunge too deep and ruin your joinery.
If your router features a micro-adjustment knob, use it only after locking the primary depth rod. Forcing the rod while the lock is engaged will bend the internal spring. If you feel resistance, stop immediately and check the lock lever. If the resistance persists, apply a small amount of dry lubricant to the rod threads to prevent binding.
Steps to Adjust Your Router Depth
- Disconnect the power supply to the router to ensure the bit doesn’t spin while you handle the depth assembly.
- Install your chosen router bit into the collet, tightening it firmly so it doesn’t slip during operation.
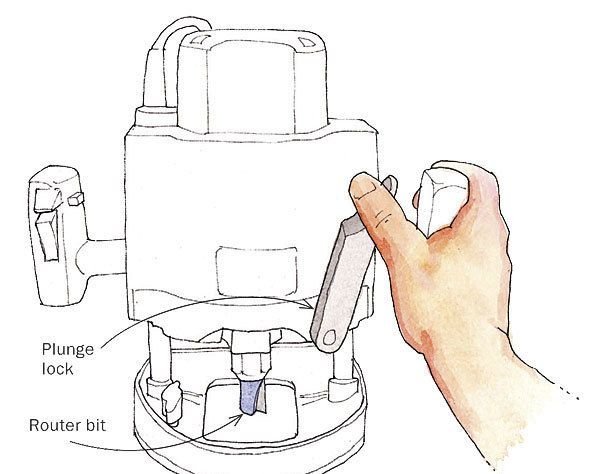
- Place the router on a flat surface and loosen the plunge lock lever so the motor moves freely up and down.
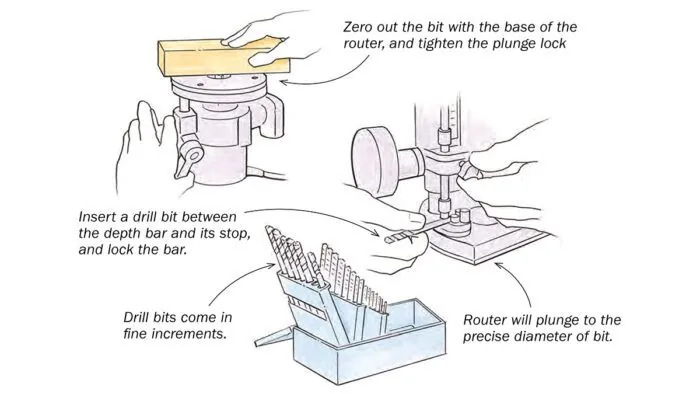
- Lower the router until the tip of the bit touches the flat surface, then tighten the plunge lock lever to hold it in this zero position.
- Release the depth stop rod by loosening its locking knob, allowing the rod to slide until it hits the highest step on the turret.
- Set the depth indicator on the rod to zero, then raise the rod by the exact amount of your desired cut depth.
- Tighten the locking knob securely, then release the plunge lock lever so the router retracts back to its starting height.
- Adjust the turret to the step you just set, then plunge the router down until the stop rod hits the turret to confirm the depth.
Tip: Always make a test cut on scrap wood before moving to your final project piece to confirm the depth is correct. Careful: If you feel the motor struggling, you’re likely trying to remove too much material in one pass; reset for a shallower cut. If your router has a micro-adjustment knob, use it for the final fraction of an inch to dial in the perfect fit.
Adjustments Based on Project Needs
The complexity of your cut changes the way you approach the depth setting. Starting with a shallow pass and increasing depth is significantly safer than attempting a deep cut that puts too much stress on the motor or the bit.
| Situation | Time/Effort | What is different | What to watch |
|---|---|---|---|
| Single shallow pass | Low | Fixed depth setting | Bit heat buildup |
| Multiple deep passes | High | Turret rotation | Consistent speed |
| Hardwood material | Medium | Slower feed rate | Burning marks |
| Softwood material | Low | Faster feed rate | Surface tearing |
Limit your depth per pass to no more than half the diameter of your router bit. Exceeding this ratio forces the bit to deflect, which creates uneven edges and increases the risk of kickback. If you notice the motor pitch dropping or the machine vibrating, stop immediately and reduce your depth by 25 percent.
Hardwood requires a slower feed rate to prevent friction burns. If you see dark, charred lines appearing on the wood grain, reduce the depth of the cut or the feed rate. Conversely, softwood is prone to splintering if you move too slowly. Keep the tool moving at a steady pace to ensure a clean finish.
Many beginners make the mistake of trying to finish a deep dado in one go. This ruins the bit’s edge and risks burning out the router motor. If the wood feels resistant, pull back and divide the remaining depth into two additional passes. You’ll save time on sanding later.
Ensuring Accuracy in Your Cuts
A good result is a clean, consistent groove that matches your planned measurement exactly. If the groove is too shallow, you haven’t accounted for the base plate thickness or the bit height correctly. If it’s too deep, the depth rod likely slipped because the locking knob wasn’t tightened enough. This common mistake costs you material and can ruin a project.
Always verify the depth rod hasn’t shifted after you tighten the knob by giving it a light tug. You can prevent errors by double-checking the measurement with a steel rule before you turn the power back on.
If you’re cutting into expensive hardwoods, perform a test pass on a scrap piece of the same thickness first. This confirms your setup without risking the final workpiece. If your bit wanders, check the collet for debris or dust buildup. A loose bit creates chatter marks that ruin the finish, forcing you to sand away precious material.
If you’re using a plunge router, lock the turret stop before you begin. If you’re using a fixed-base router, ensure the motor housing is fully seated in the base. A gap of even one millimeter here will cause your depth to drift during the cut.
Safety Standards and Maintenance
Wear eye protection and hearing protection every time you power on the motor, regardless of how short the task seems.
After you finish your work, remove the router bit and clean the collet with a dry cloth to prevent resin buildup.
If the depth rod feels stiff, apply a tiny amount of dry lubricant to the threads. Never use oil-based grease here, as it attracts sawdust and creates a grinding paste that accelerates wear. If the rod feels gritty during adjustment, stop and clear the threads with a nylon brush before adding more lubricant.
If you find the depth rod is bent or the threads are stripped, stop using the tool immediately. Order a replacement part directly from the manufacturer. Attempting to force a damaged adjustment mechanism often leads to uneven cuts that can cause the router to kick back during operation.
Alternative Methods for Depth Control
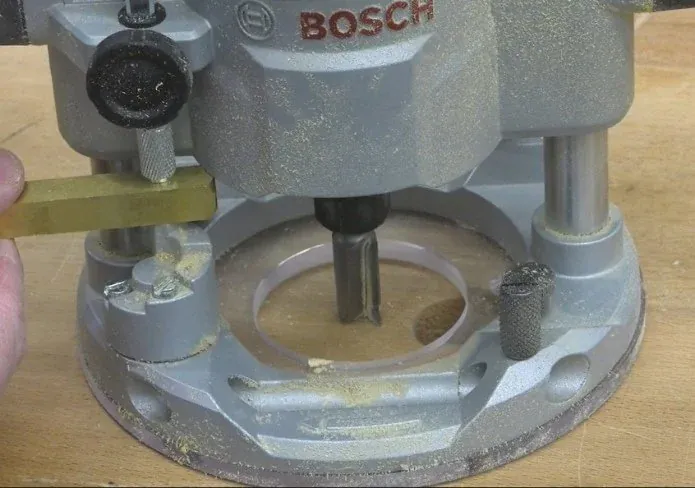
Using a Setup Block
You can place a block of wood of a known height under the bit to set your depth quickly. This is faster than using the rod but requires you to have a block that matches your target depth exactly. If you don’t have the right size, this method becomes inaccurate.
Digital Router Gauges
These magnetic gauges attach to the router base and provide a readout of the bit height. They’re highly accurate but add to your equipment cost. They’re best for professionals who change depths frequently throughout the day.
Router Table Mounting
If you mount your router in a table, the depth is adjusted via a knob on the top of the table. This is the most consistent method for repetitive work. It changes the workflow entirely, as you move the wood instead of the router.
Related guides
- 10 Best Plunge Routers for Woodworking: Top Picks for Every Shop
- Fixed-Base vs Plunge Router: Which One Do You Need?
Frequently asked questions
How do I know if my router bit is sharp enough?
A sharp bit leaves a smooth surface without dark burn marks or fuzzy edges. If you have to push the router hard to make a cut, the bit is likely dull and needs replacing.
Can I set the depth while the router is running?
No, never attempt to adjust the depth rod or turret while the motor is spinning. Always unplug the tool or remove the battery before making any physical adjustments to the depth assembly.
How long does a router bit stay sharp?
It depends on the material, but a quality carbide bit typically lasts for several thousand feet of cutting in softwoods. Harder materials like oak or MDF will dull the edges faster.
Is it safe to cut the full depth in one pass?
No, it’s rarely safe to cut the full depth in one pass, as it increases the risk of kickback and motor strain. Use the turret to step down in increments of 1/8 inch or less for better control.
What happens if the depth rod slips?
If the rod slips, your cut will be deeper than intended, which can ruin your workpiece. Always check that the locking knob is tight before you start the motor.
How do I measure the depth if I have a base plate?
You must measure from the bottom of the base plate, not the router body. Add the thickness of the plate to your total depth calculation to ensure the bit reaches the wood correctly.
Conclusion
Always perform a quick test cut on a piece of scrap wood before you start your actual project. This simple habit confirms your settings are perfect and saves your main workpiece from any accidental errors. You’ll feel much more confident once you’ve verified the fit and are ready to begin routing.