Router Bit Types Explained: Which Bit to Use for Each Woodworking Job
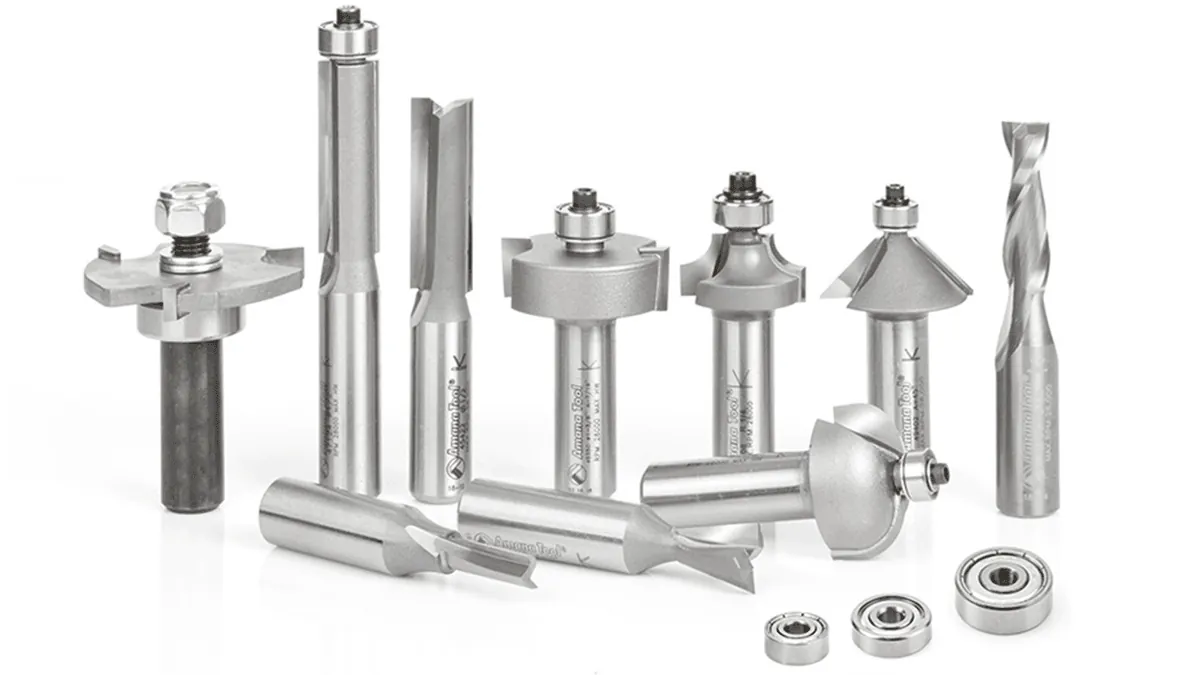
You choose a router bit by matching its profile to your desired edge shape and its shank size to your machine’s collet. Because there are many router bit types explained: which bit to use for each woodworking job depends on whether you’re cutting straight grooves, decorative edges, or complex joinery. Always verify your router’s maximum speed and collet diameter before buying.
Router bit types explained for each job
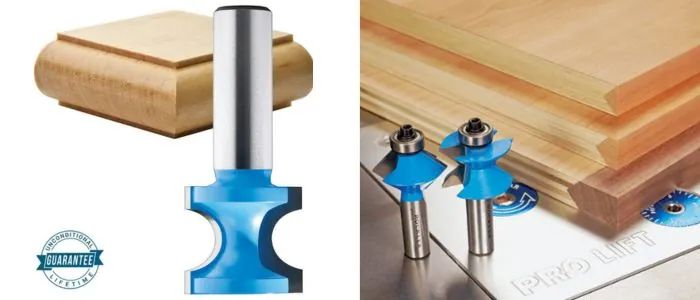
Router bits are specialized cutting tools designed to spin at high speeds to shape wood. They consist of a hardened steel shank and cutting edges made from high-speed steel or carbide. Carbide-tipped bits stay sharp much longer than steel, making them the standard choice for most projects. You should use a 1/2-inch shank bit whenever possible because it’s more stable and vibrates less than a 1/4-inch shank.
People often think that a larger bit is always better for deep cuts. This is a mistake; large bits require slower feed speeds to prevent burning the wood. If you push a large bit too hard, you risk damaging the motor or creating an uneven cut. Always check the ANSI B175.1 safety requirements regarding power tool safety to ensure your equipment is used within its intended limits.
How to Select and Use Bits
Follow these steps to choose and install the correct bit for your specific task:
- Identify your cut: Use a straight bit for grooves, a round-over bit for edges, or a flush-trim bit for pattern work.
- Check the collet: Ensure your router collet matches the bit shank size (1/4 inch or 1/2 inch).
- Set the depth: Insert the bit into the collet so that at least 3/4 of the shank length is gripped, but don’t bottom it out against the collet floor.
- Adjust the speed: Set the router speed according to the bit diameter; larger bits require lower RPMs to prevent overheating.
- Make trial cuts: Always test your depth and feed rate on a piece of scrap wood of the same species.
- Feed against the rotation: Move the router so the bit cuts into the wood, not away from it, to prevent grabbing.
The main judgment call is the feed rate. If the wood smokes or burns, move the router faster. If the motor sounds like it’s struggling or the bit chatters, slow your movement down. If you’re inexperienced with power tools, consult a local woodworking shop or instructor before attempting complex cuts.
Router Bit Quick Reference Table
| Situation | What to use | How long | What to watch for |
|---|---|---|---|
| Straight grooves | Straight bit | Multiple passes | Bit overheating |
| Softening edges | Round-over bit | One pass | Grain direction |
| Pattern cutting | Flush-trim bit | Constant speed | Bearing condition |
| Decorative edges | Ogee bit | Slow feed | Burning wood |
| Rabbet joints | Rabbeting bit | One pass | Depth setting |
Achieving Professional Woodworking Results
Experienced woodworkers prioritize safety and precision by preparing their workspace before starting the machine. They clear the area of debris and ensure the workpiece is clamped securely to the bench. If the wood moves during the cut, you’ll ruin the profile and potentially damage the bit. Always inspect the carbide tips for chips or dullness before you begin, as a dull bit requires more force and is harder to control.
When cutting, maintain a steady rhythm without stopping the router in the middle of a pass. Stopping creates “burn marks” where the spinning bit stays in one spot too long. If you need to make a deep cut, do it in several shallow passes rather than one deep one. This reduces stress on both the motor and the bit, ensuring a cleaner finish and a much longer life for your tools.
Troubleshooting Common Cutting Issues
| What you notice | What it usually means | What to do first |
|---|---|---|
| Dark burn marks | Feed rate too slow | Increase movement speed |
| Rough, torn edges | Dull bit | Replace or sharpen bit |
| Excessive vibration | Loose collet | Tighten collet nut |
| Chatter marks | Unstable setup | Re-clamp workpiece |
Increase your speed by 10 percent increments until the wood remains cool to the touch.
Never ignore chatter marks, as they indicate a harmonic resonance that can snap a carbide bit in seconds. If re-clamping the workpiece fails to stop the vibration, check your spindle bearings for play.
Ensure the bit is inserted deep enough into the collet to be securely gripped, but never bottom the bit out against the collet floor. This simple adjustment prevents the bit from slipping during deep passes.
Safety and Regulatory Guidelines
Operating a router requires strict adherence to safety protocols to prevent injury. The Consumer Product Safety Commission emphasizes that you must wear proper eye and ear protection at all times when using power tools. Never wear loose clothing or jewelry that could get caught in the rotating machinery. If you’re unsure about the safety features of your specific router model, refer to the manufacturer’s manual for the official guidance on guard placement and speed settings.
Maintaining Your Equipment for Longevity
After you finish your project, clean your bits to remove resin and pitch buildup. Use a dedicated router bit cleaner or a mild solvent to wipe the carbide edges, then store them in a wooden block or their original cases. Never store bits loose in a drawer, as the edges will knock against each other and dull quickly. If you notice the bit becoming difficult to push through wood even at a steady pace, it’s likely time for professional sharpening.
When to Choose Alternative Tools
Sometimes a router isn’t the right tool for the job. If you need to remove a large amount of material quickly, a table saw or a band saw is more efficient and safer. For delicate detail work that requires extreme precision, hand-carving chisels are a better choice.
Using a router for tasks it wasn’t designed for can lead to dangerous kickback. Always evaluate the size of your workpiece and the type of cut to determine if a router is the best tool available.
Frequently asked questions
Can I use a 1/4-inch bit in a 1/2-inch collet?
No, you must use a reducer bushing designed for that specific router. Using a bit in the wrong size collet prevents a secure grip, which allows the bit to slip out during use and creates a severe safety hazard.
How often should I sharpen my router bits?
You should sharpen them once you notice a decrease in cut quality or visible burning on the wood. There’s no set time frame, as it depends entirely on the hardness of the wood species you’re cutting and your usage frequency.
Is it safe to use a router bit with a chipped carbide tip?
No, a chipped bit is unsafe because it creates an unbalanced load on the router motor. The uneven weight distribution causes vibration that can damage your machine and lead to unpredictable, jagged cuts that are dangerous to handle.
How deep should my first router pass be?
Your first pass should be no deeper than 1/4 inch for most standard jobs. If you need to remove more material, make multiple shallow passes rather than one deep one to prevent the motor from stalling and to ensure a smooth finish.
Why does my router bit burn the wood?
It burns the wood because the feed speed is too slow relative to the rotation of the bit. Increase your movement speed across the wood to allow the cutting edges to clear the material rather than rubbing against it and creating heat.
Conclusion
Cleaning your bits after every session prevents the accumulation of sap, which is the primary cause of friction and premature dulling. Keep your bits in a dry place to prevent rust on the steel shanks, and always verify that your collet is free of dust before inserting a new bit. Taking these small steps will keep your tools cutting cleanly for years.