Plunge Router vs. Trim Router: Differences, Uses, and Which to Choose
Selecting the right equipment for your workshop often begins with understanding the plunge router vs. trim router differences, uses, and which to choose for your specific woodworking projects. These two power tools are cornerstones of any shop, yet they perform vastly different functions. A plunge router typically costs between $150 and $450, while a trim router generally ranges from $90 to $250. Understanding their unique capabilities ensures you invest in the machinery that matches your skill level and project requirements.
Key Takeaways

- Plunge routers are essential for stopped dados, mortises, and inlay work where the bit must enter the wood mid-board.
- Trim routers excel at edge treatments, such as rounding over, chamfering, or flush-trimming laminate edges.
- The plunge mechanism allows for vertical depth control while the motor is running, providing superior safety and precision.
- One-handed operation is a signature feature of trim routers, making them ideal for light-duty finishing tasks.
- Always prioritize bit compatibility and base plate visibility when selecting your first router model for the shop.
Understanding the Plunge Router Mechanism
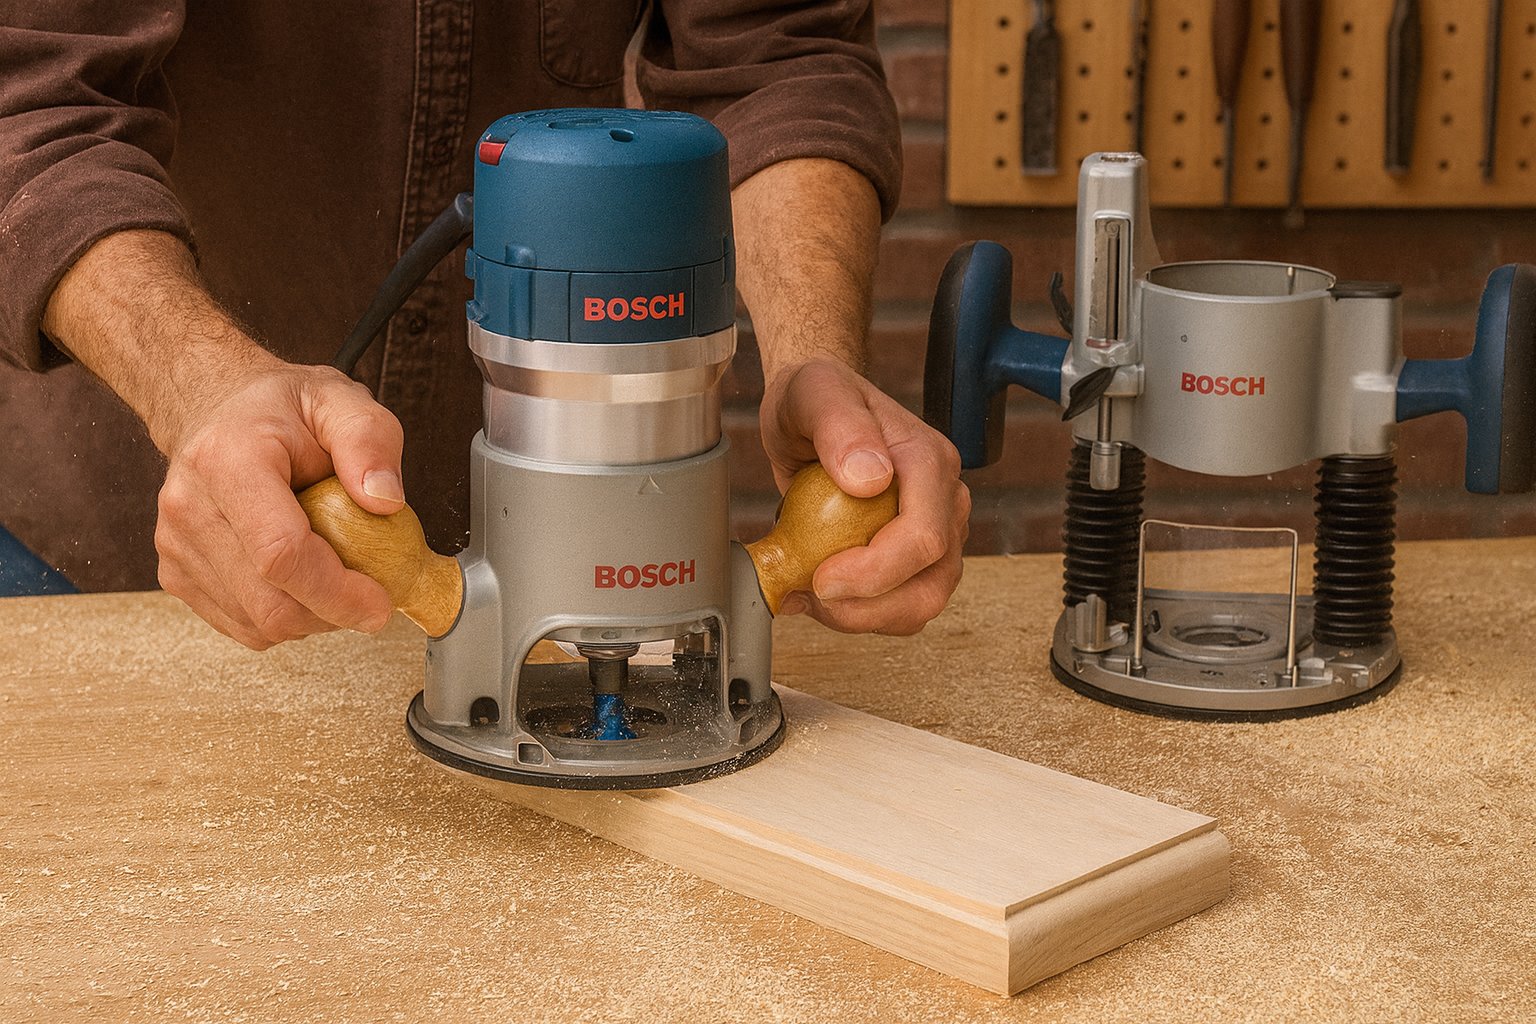
The defining feature of a plunge router is its spring-loaded base, which allows the motor assembly to move vertically relative to the fixed baseplate. This design enables the user to lower a spinning bit directly into the surface of the workpiece. This is a critical functionality when you need to start a cut in the middle of a board rather than starting from the edge.
The plunge mechanism is controlled by two large handles located on the sides of the tool. By releasing a locking lever, you can push down against the spring tension to reach a pre-set depth. Once the desired depth is reached, you can engage the depth stop to ensure consistent cuts across multiple pieces. This makes it the go-to tool for repetitive tasks like cutting mortises for door hinges or creating recessed pockets for hardware.
Why use a plunge router?
You should reach for this tool whenever your project requires internal cuts or precision depth adjustments. Because the motor is suspended on two guide rods, the tool remains stable even when the bit is fully extended. Many models include a multi-step turret gauge, which allows you to make a deep cut in several smaller, safer passes, reducing strain on both the motor and the wood.
Why Choose a Trim Router?
A trim router, often called a palm router, is a compact, lightweight machine designed for portability and maneuverability. Unlike the plunge router, it typically features a fixed base, though some models offer an interchangeable plunge base accessory. These tools are powered by smaller motors, usually ranging from 1 to 1.25 horsepower, which is sufficient for light woodworking tasks.
The primary advantage of the trim router is its size. You can easily control it with one hand, which leaves your other hand free to steady the workpiece or clear away debris. This maneuverability makes it the perfect choice for following curved templates or trimming edge banding on furniture. Because they’re smaller, they’re also easier to store and transport to job sites.
Common applications for trim routers
| Task | Trim Router Suitability | Plunge Router Suitability |
|---|---|---|
| Rounding over edges | Excellent | Good |
| Cutting mortises | Poor | Excellent |
| Flush trimming laminate | Excellent | Poor |
| Hinge recesses | Poor | Excellent |
| Decorative edge profiles | Good | Excellent |
Comparing Technical Specifications
When evaluating the plunge router vs. trim router, you must consider the motor power and physical weight. Plunge routers are heavy, robust machines often weighing between 10 and 15 pounds. This weight provides stability but can lead to fatigue during extended use. Conversely, trim routers weigh between 3 and 5 pounds, making them incredibly agile for long sessions of edge work.
The bit capacity is another major differentiator. Most trim routers are limited to 1/4-inch collets, meaning they can’t handle large-diameter bits or heavy-duty panel raising cutters. Plunge routers usually support both 1/4-inch and 1/2-inch collets. The 1/2-inch shank bits are more stable and less prone to vibration, allowing for deeper, more aggressive cuts in hardwoods.
Is a plunge or trim better?

The answer depends entirely on the stage of your woodworking process. If you’re building a cabinet carcass, a plunge router is necessary for the joinery. If you’re finishing that same cabinet by applying edge banding or decorative profiles, the trim router is the superior choice. Most professional woodworkers eventually own both, but if you’re just starting, consider the nature of your most frequent projects.
Warning: Always disconnect the power supply before changing router bits to prevent accidental activation, as specified by the Occupational Safety and Health Administration guidelines regarding machine maintenance and safety.
Choosing between plunge and trim routers
- Project Scale: Are you building large tables or small jewelry boxes?
- Budgetary Constraints: Can you afford one high-quality tool or two budget-friendly options?
- Available Workspace: Do you have a dedicated router table or limited bench space?
- Physical Strength: Can you comfortably handle a heavy plunge router for long periods?
Which Features Truly Matter?
When shopping for these tools, don’t get distracted by excessive bells and whistles. Focus on the quality of the adjustment mechanism. For a plunge router, the depth stop should lock firmly without shifting. For a trim router, the base adjustment should be smooth and precise, allowing for micro-adjustments in depth.
Variable speed control is another feature that’s highly beneficial. Different wood species and bit diameters require different rotational speeds to prevent burning the wood or damaging the bit. A router that allows you to dial in the exact RPM will significantly improve your finish quality and extend the life of your expensive carbide cutters.
Safety and Best Practices
Router safety is paramount. Because these tools spin at speeds ranging from 10,000 to 30,000 RPM, they can be dangerous if handled improperly. Always wear eye and ear protection. Furthermore, ensure your workpiece is securely clamped to your workbench. Never attempt to “freehand” a cut on a loose piece of wood, as the torque of the motor can cause the tool to kick back or jump.
Pro Tip: Always make your cuts in the direction that forces the router against the guide or fence, which is known as climb cutting prevention; feeding against the rotation of the bit ensures the router stays pulled into the work rather than being pushed away.
Maintaining your equipment
- Clean the Collet: Use compressed air to remove dust from the collet after every use.
- Inspect Bits: Check for dullness or chips in the carbide edges.
- Check Power Cords: Ensure no fraying or exposed copper is present.
- Lubricate Rods: Keep the plunge rods clean and lightly oiled for smooth action.
Common Brands and Models

When selecting a tool, look for established manufacturers with strong track records. Brands like DeWalt, Bosch, Makita, and Milwaukee dominate the market because they offer excellent support and interchangeable accessories. For example, many of these brands offer “combo kits” that include both a fixed base and a plunge base for the same motor, providing the best of both worlds in a single package.
Recommended starting options
- DeWalt DW618: A versatile mid-sized router that handles most shop tasks with ease.
- Bosch PR20EVS: A gold standard for trim routers due to its ergonomic design and reliable motor.
- Makita RT0701C: Known for its precise depth control and excellent visibility of the bit.
- Milwaukee M18 Fuel: A powerful cordless option that provides freedom from extension cords.
Related guides
- Plunge Router vs Fixed-Base Router: Which One to Choose
- 10 Best Plunge Routers for Woodworking: Top Picks for Every Shop
- Fixed-Base vs Plunge Router: Which One Do You Need?
Frequently Asked Questions
Can a trim router cut mortises?
While it’s technically possible to use a trim router for small, shallow mortises, it isn’t recommended. Trim routers lack the stability and depth-plunging mechanism required to create consistent, straight-walled mortises. They can easily wander, leading to sloppy joints. A plunge router is specifically designed for the vertical control needed to create clean mortises for hinges or tenons.
Do I need a router table?
A router table significantly expands the capabilities of both plunge and trim routers. It allows you to perform edge profiling, joinery, and molding work with greater safety and precision by securing the tool upside down. While not strictly required for basic tasks, a router table is a transformative addition to any workshop once you move beyond simple freehand routing.
How do I prevent wood burning?
Burning is usually caused by taking too deep of a cut or moving the router too slowly across the wood. To prevent this, make multiple shallow passes instead of one deep pass. Additionally, ensure your router bits are sharp; a dull bit generates excessive friction. Finally, match the speed of your router to the diameter of the bit you’re using.
Is cordless worth the investment?
Cordless routers are excellent for light-duty tasks, such as rounding over edges or trimming laminate, where mobility is key. However, for heavy-duty work like cutting large dados or deep mortises, corded routers still offer more consistent power and run time. If you only have one router, a corded model is generally more reliable for a wider variety of demanding workshop applications.
What is the purpose of a collet?
The collet is the mechanism that grips the shank of the router bit. It works like a chuck on a drill, using a tapered sleeve to tighten around the bit as the nut is turned. It’s vital to keep the collet clean and free of debris, as a dirty collet won’t grip the bit securely, which can cause the bit to vibrate or slip during use.
Conclusion
Starting your journey into routing is an exciting step that will open up a vast array of possibilities for your woodworking projects. Begin by assessing the specific tasks you intend to complete in the coming months, such as edge profiling or joinery. Once you identify your primary needs, invest in a quality router, practice on scrap wood, and always prioritize your personal safety above all else.