How to Use Guide Bushings and Templates with a Plunge Router
Using guide bushings and templates with a plunge router allows you to create precise, repeatable shapes, cut perfect mortises, and inlay complex designs that would be impossible to achieve freehand. By mounting a metal or plastic collar—the bushing—to your router’s base, you create a physical offset that tracks against a rigid pattern, ensuring the cutting bit stays exactly where it needs to be every time.
Key Takeaways
- Always calculate your offset distance by subtracting the bit diameter from the bushing outer diameter and dividing by two.
- Ensure your template is at least 1/4 inch thick to provide a solid edge for the bushing to ride against.
- Secure your workpiece and template using heavy-duty clamps or double-sided tape to prevent shifting during the cut.
- Perform a test cut on scrap material to verify your template dimensions before routing the final project piece.
- Check your router base for centering accuracy using a cone tool to prevent uneven cuts around the template.
Guide Bushings and Plunge Router Basics
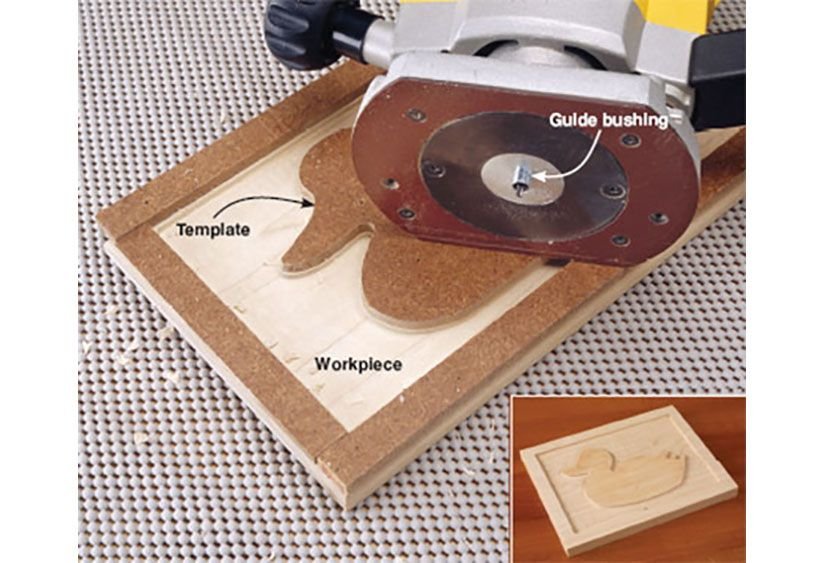
A guide bushing is a circular metal or phenolic sleeve that fits into the center hole of your router’s sub-base. The router bit passes through the center of this bushing, while the outside of the bushing follows the edge of your template. This system is essential for pattern routing, where you need to duplicate a specific shape multiple times across several pieces of wood.
When using a plunge router, the bit remains stationary relative to the base until you engage the plunge mechanism. This is superior to fixed-base routers for template work because you can safely start your cut in the middle of a board—such as when cutting a recessed pocket—by plunging the bit into the wood after the bushing has made contact with the template.
Calculating Your Offset Distance
The most critical aspect of using this system is understanding the bushing offset. Because the bushing is wider than the bit, the actual cut will be slightly offset from the edge of the template. You must account for this difference when designing your templates.
| Component | Calculation Logic | Result |
|---|---|---|
| Bushing OD | Measure outer diameter | 5/8″ (0.625″) |
| Router Bit | Measure cutting diameter | 1/2″ (0.500″) |
| Offset Math | (Bushing OD – Bit OD) / 2 | 0.0625″ (1/16″) |
If you’re cutting an internal shape, your template must be larger than the desired hole by the amount of the offset. If you’re cutting an external shape, the template must be smaller than the final piece by that same distance.
How to Set Up Your Router
Before you start, ensure your router is properly prepared. Most modern routers come with a sub-base that accepts universal guide bushings, often referred to as the Porter-Cable style. If your router base isn’t perfectly centered, your cut will be uneven, with the bit being closer to the template on one side than the other.
- Install the base plate: Ensure the plate is flush and secure.
- Insert the bushing: Use the provided locking nut to tighten the bushing into the center of the base.
- Center the bit: Use a centering cone to align the bushing exactly with the router collet.
- Check plunge depth: Set your depth stop so the bit clears the template and the wood without hitting your workbench.
Warning: Always disconnect the power cord or remove the battery before changing bits or adjusting the guide bushing to prevent accidental activation.
Choosing the Right Template Material
Your templates serve as the “master” for your work, so they must be durable and rigid. Cheap materials will flex or degrade, leading to inaccurate cuts. When selecting materials, consider how many times you intend to use the template.
- MDF (Medium Density Fiberboard): Excellent for one-off projects or simple shapes.
- Baltic Birch Plywood: Highly stable and durable for long-term shop use.
- Acrylic or Polycarbonate: Transparent, which allows you to see the wood grain beneath the template.
- Phenolic Sheet: Extremely durable and slick, reducing friction against the bushing.
Pro Tip: If you’re using wooden templates, apply a thin coat of paste wax to the edges to help the metal guide bushing slide smoothly without grabbing or burning the wood.
Step-by-Step Template Routing Process
To achieve professional results, follow a methodical approach. Start by milling your workpiece to its final thickness. If you’re using a template that covers the entire surface, use heavy-duty toggle clamps or double-sided carpet tape to hold the template firmly in place.
- Rough cut: Use a jigsaw or bandsaw to remove excess material within 1/8 inch of your layout line.
- Position template: Align the template precisely over your workpiece.
- Secure template: Use clamps or adhesive to ensure zero movement.
- Initial pass: Set the router to a shallow depth of 1/8 to 1/4 inch.
- Final pass: Plunge to the final depth and make a slow, steady pass to clean up the edge.
Managing Dust and Visibility
Routing creates a massive amount of fine dust, which can quickly obscure your template and your layout lines. If you can’t see the edge of the template, you’re more likely to make a mistake or lose contact with the guide.
- Dust extraction: Use a vacuum hose attached to your router’s dust port.
- Compressed air: Keep a nozzle handy to clear the template path between passes.
- Lighting: Use a high-lumen LED shop light to illuminate the area where the bushing meets the template.
Troubleshooting Common Routing Issues
Even with the best preparation, things can go wrong. If you notice burning or uneven edges, stop immediately and check your equipment.
| Symptom | Likely Cause | Solution |
|---|---|---|
| Burning edges | Dull router bit | Sharpen or replace the bit |
| Uneven cut width | Off-center bushing | Re-center using a centering cone |
| Template movement | Weak adhesive/clamps | Use mechanical fasteners |
| Chatter marks | Too much material removed | Take shallower, lighter passes |
Advanced Template Routing Techniques
Once you master basic shapes, you can advance to complex inlay work. Inlay work requires two different bushings: a smaller one for the inlay piece and a larger one for the pocket. By using a bushing collar adapter, you can quickly switch between sizes without removing the base plate. This process allows for seamless fitment between two pieces of wood.
Essential Tools for the Shop
To be efficient, keep these specific items organized in your shop. Having a dedicated drawer for your routing accessories will save hours of searching.
- Centering cones: Essential for every router owner to ensure accuracy.
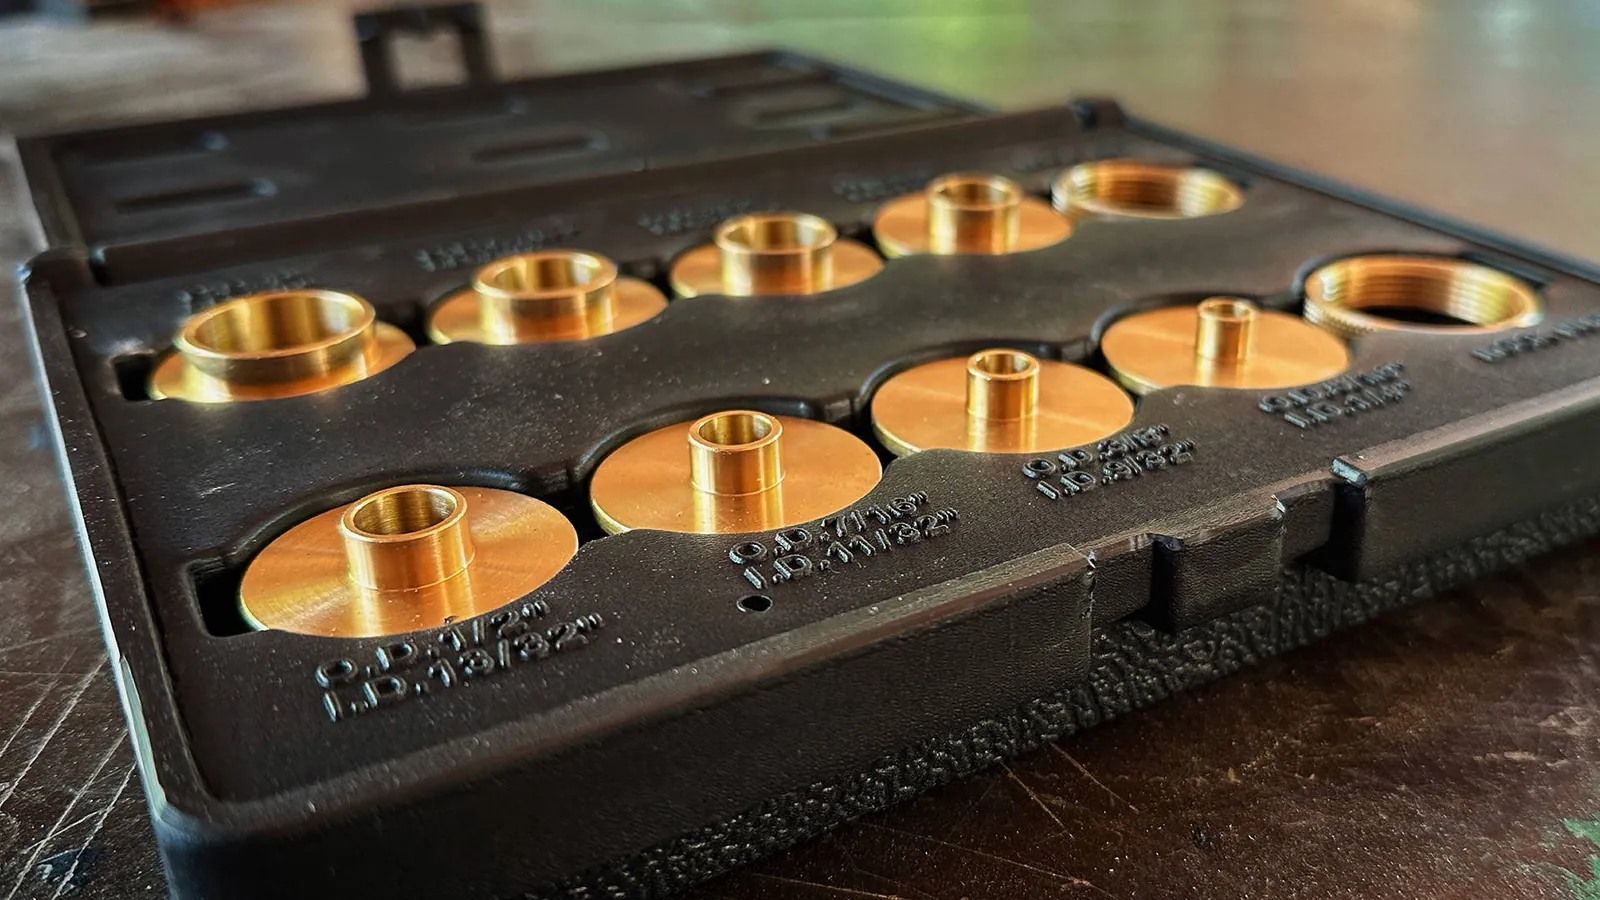
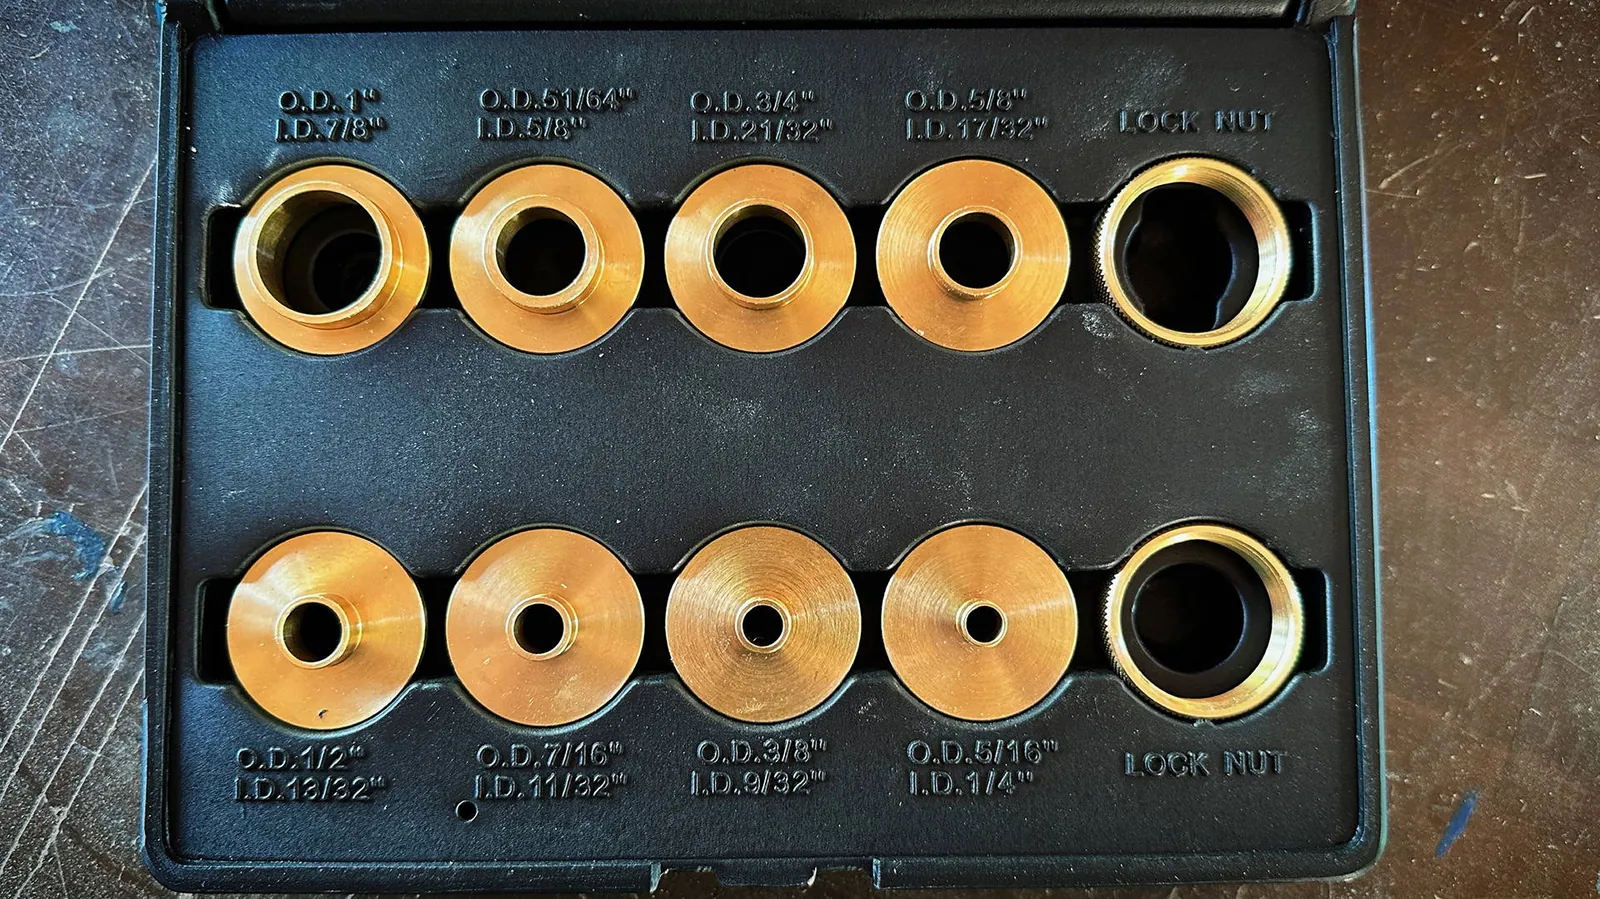
- Bushing kits: Sets that include multiple common sizes (e.g., 5/16″, 7/16″, 5/8″).
- Pattern bits: Used when you want to follow a template without a bushing.
- Double-sided tape: Specifically designed for woodworking to prevent residue.
Frequently Asked Questions
Can I use a guide bushing with a handheld router?
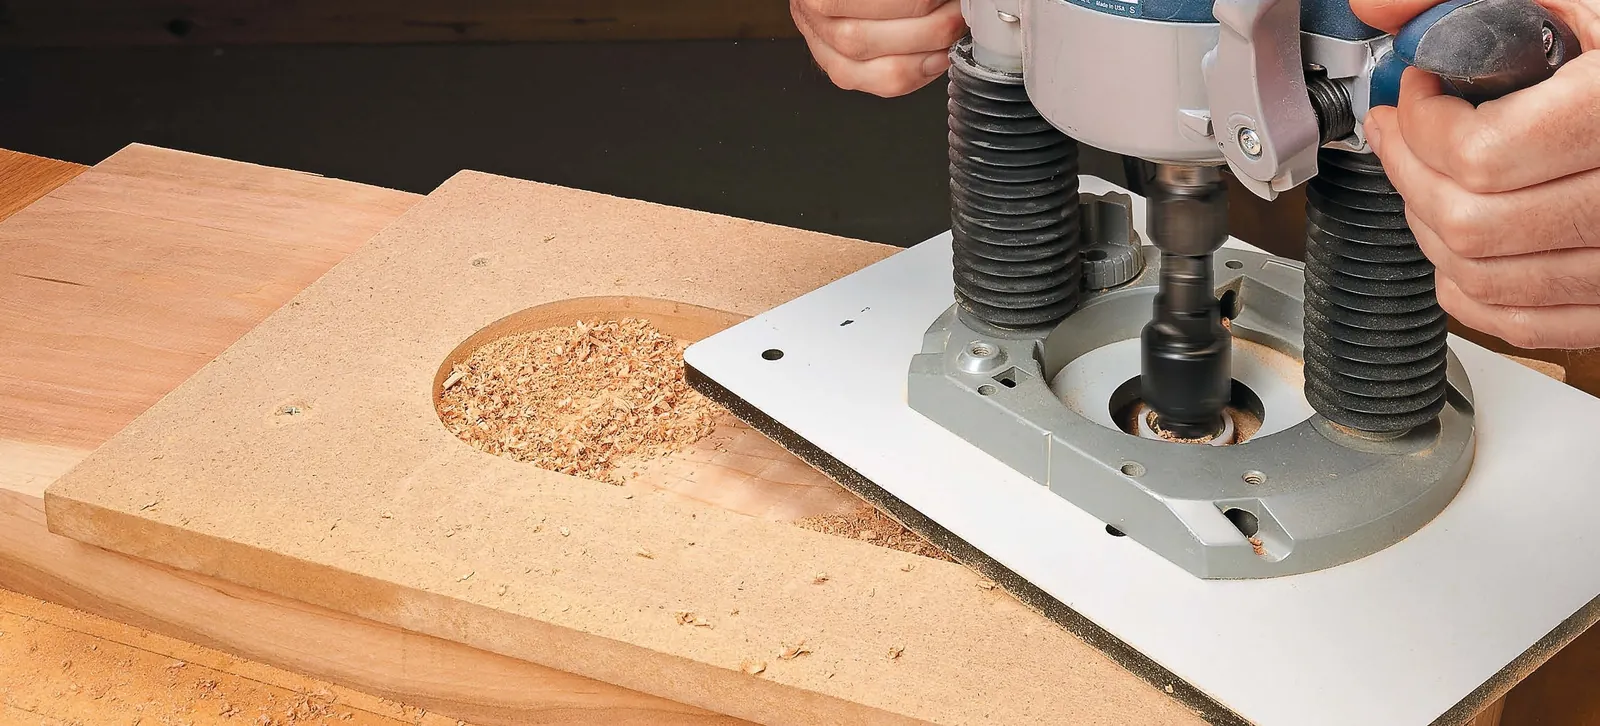
Yes, you can use guide bushings with almost any handheld plunge router. The process remains the same as with a router table, but you must ensure you maintain downward pressure on the base to keep the bushing firmly against the template edge. Always keep your hands clear of the bit path and ensure your workpiece is securely clamped to a stable workbench before starting the router.
Why does my router bit burn the wood?
Burning usually occurs because the bit is dull, the feed rate is too slow, or the router speed is too high. If you move the router too slowly, the bit remains in contact with the wood fibers longer than necessary, creating friction heat. Ensure your bits are sharp, maintain a consistent feed rate, and check that your router speed is set according to the bit manufacturer’s recommendations.
How do I make my own templates?
You can create templates using a bandsaw or jigsaw to cut your desired shape out of MDF or plywood. Once the shape is cut, use a file, sandpaper, or a spindle sander to smooth the edges perfectly. The accuracy of your final project depends entirely on the smoothness and precision of your template edges, so spend extra time refining the template before using it.
Do I need a specific bit for template routing?
You generally use a straight bit when working with guide bushings. The diameter of the bit must be smaller than the inner diameter of the bushing to allow it to pass through. If you’re using a pattern-following bit that has a ball-bearing at the top or bottom, you don’t need a guide bushing at all, as the bearing acts as the guide.
How do I route internal pockets?
To route a pocket, place your template over the area you want to excavate. Secure the template, then plunge the router bit into the center of the waste area. Move the router to the edge of the template, engage the bushing against the edge, and route clockwise around the perimeter of the pocket. Once the perimeter is clean, remove the remaining material in the center of the pocket.
Conclusion
To get started with your next project, gather a scrap piece of 3/4-inch MDF and your router, then practice creating a simple rectangular pocket using a standard 5/8-inch guide bushing and a 1/2-inch straight bit. Observing how the bushing interacts with the template edge will give you the confidence to tackle more complex designs and improve your overall routing precision.